i’m back

chop, chop! meet your meal plan’s new best friend.

Hi there! Remember me? The pre-diabetic newlywed who wrote regular blogs about her husband’s voracious appetite and making meals that satisfied them both? I haven’t been here in while, I know. It’s not that I didn’t want to catch everyone up…but it turns out life threw a bit more our way than we anticipated since last fall.

Here’s the recap:

  • I got promoted (yay!)
  • I coached two more seasons of Girls on the Run (#girlpower)
  • I developed an allergy to penicillin (yikes!)
  • Tom got promoted (double yay!)
  • Tom was on two softball teams, a soccer team, a broomball team, and a baseball team (#overachiever)
  • Tom started drinking coffee (!!!)
  • We went on a trip to Amsterdam and Italy…and wore matching shoes the entire time (yep…we’re that couple!)
  • We celebrated three years of marriage (can’t call us newlyweds anymore!)
  • We…found out my mom had breast cancer.

It seems like forever ago we found out…but it was only this past May. My energizer bunny of a mama who constantly took care of everyone around her was brought to a standstill by six little letters. That said, we’re very blessed. My mama is a warrior who made the brave decision to have a double mastectomy; while there’s a long road ahead, she’s on her way to recovery.

even in the toughest times, we at least never lost our sense of humor!

Interestingly enough, it was this terrible, horrible diagnosis that drew me back to this blog. When my mom first got sick I felt utterly helpless. As a girl with a bias for action in everything I do, it killed me to not be able to do anything to heal my mom or take away her pain. That said, I knew I could do one thing: I could cook.

As I’ve stated before, I truly believe that food is so much bigger than simply fulfilling a bodily need. The reason I’ve always been so passionate about finding meals that bring joy to both me and Tom is because I truly see food as a beautiful, personal, tangible way to serve others and show them that you care. My goal every time I make a meal or bake a dessert is that people will literally feel loved when they sit at my table*

[*Hence why it was so important that we got one that fit twelve people…thanks again for that, Thomas! I want to show a LOT of people love! 🙂]

So when it came to my mama, I went to town. I took every feeling of helplessness and threw it into making breakfasts, lunches, dinners, and desserts that my mom and family could enjoy during the toughest times when the last thing they needed to worry about was making food to nurse them back to health both physically and emotionally.

And while whipping up all those freezer meals, it hit me: I missed sharing the stories of our edible compromises and the joy that they continually bring to our marriage. I realized that it had been months since I’d written anything more than a bullet-pointed email and I had started to worry that I may have even forgotten how to use a semi-colon [I’m only half-joking here…]. In reflecting, I don’t know if it was the pressure to follow the same format of my detailed step-by-steps or the concern that my recipes weren’t good enough to share, but for all those months I had let silly excuses get in the way of continuing to do what I love.

But not anymore.

So here I am. I’m back, but I’m also different (and not just because I’m apparently allergic to penicillin now…?)

Tom and I are no longer newlyweds and we’re no longer dealing with the struggles of finding compromise* Like a beloved and well-worn sweatshirt, we’ve settled into a beautifully comfortable shared understanding of how to ensure the other is always well-fed and nourished in both body and spirit.

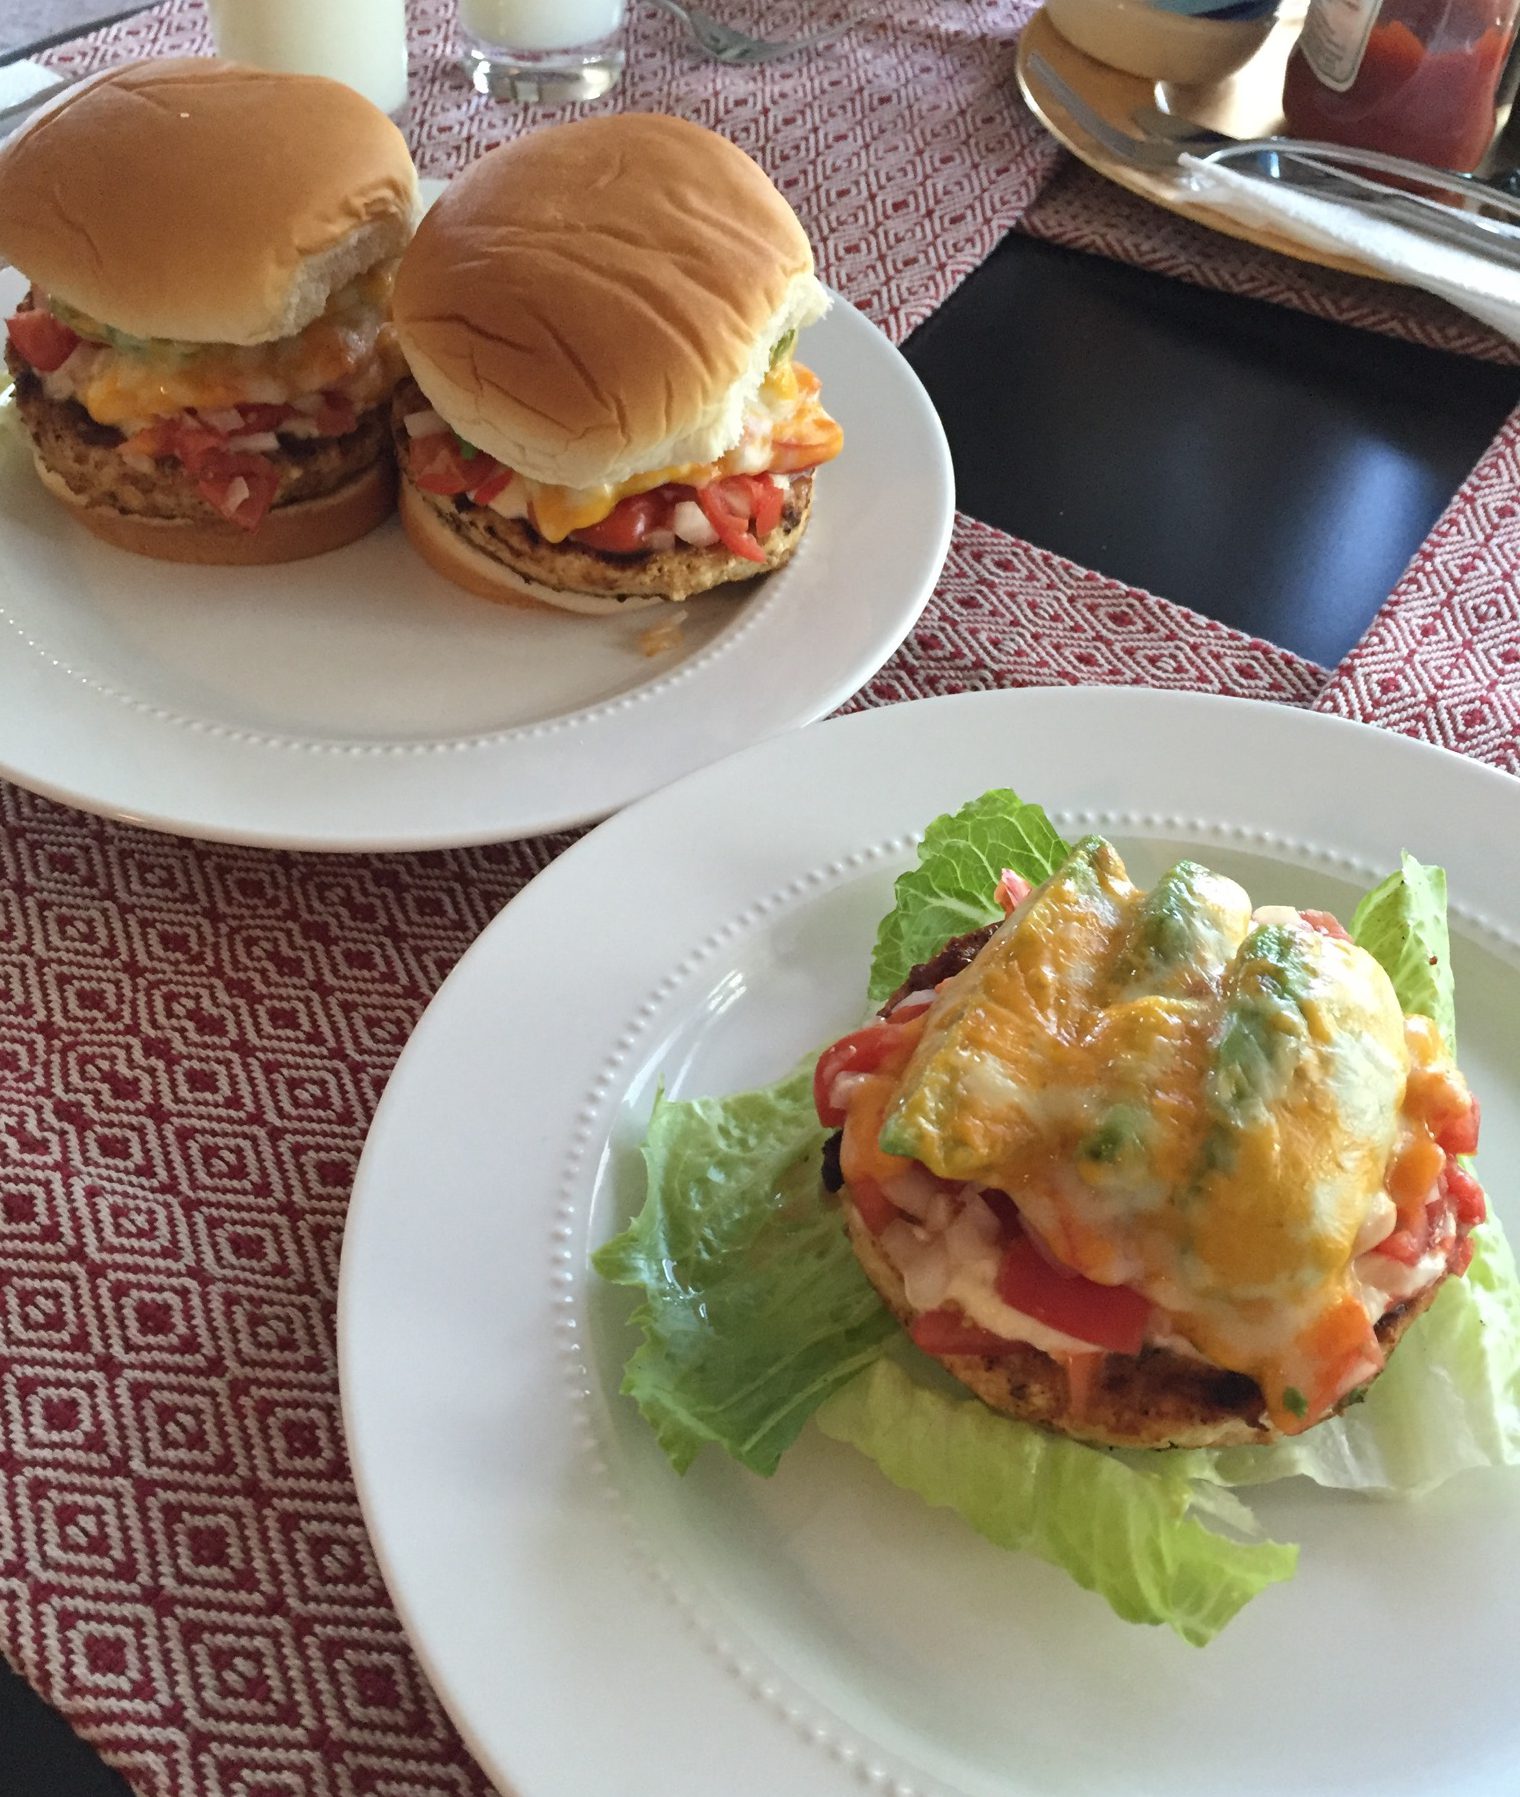
[*For example, I’ve learned there is no such thing as a “compromise” burger bun. There is only Tom having a bun with his burger and me not. Why? The best burger bun is made of white bread, delectably squishy, and has a crap ton of sugar. Nothing I can make or substitute can compete with that!]

you win, burger bun. you win.

We have lots of recipes and stories to share and I can’t wait to make up for lost time with you. So enjoy…because I know I am.

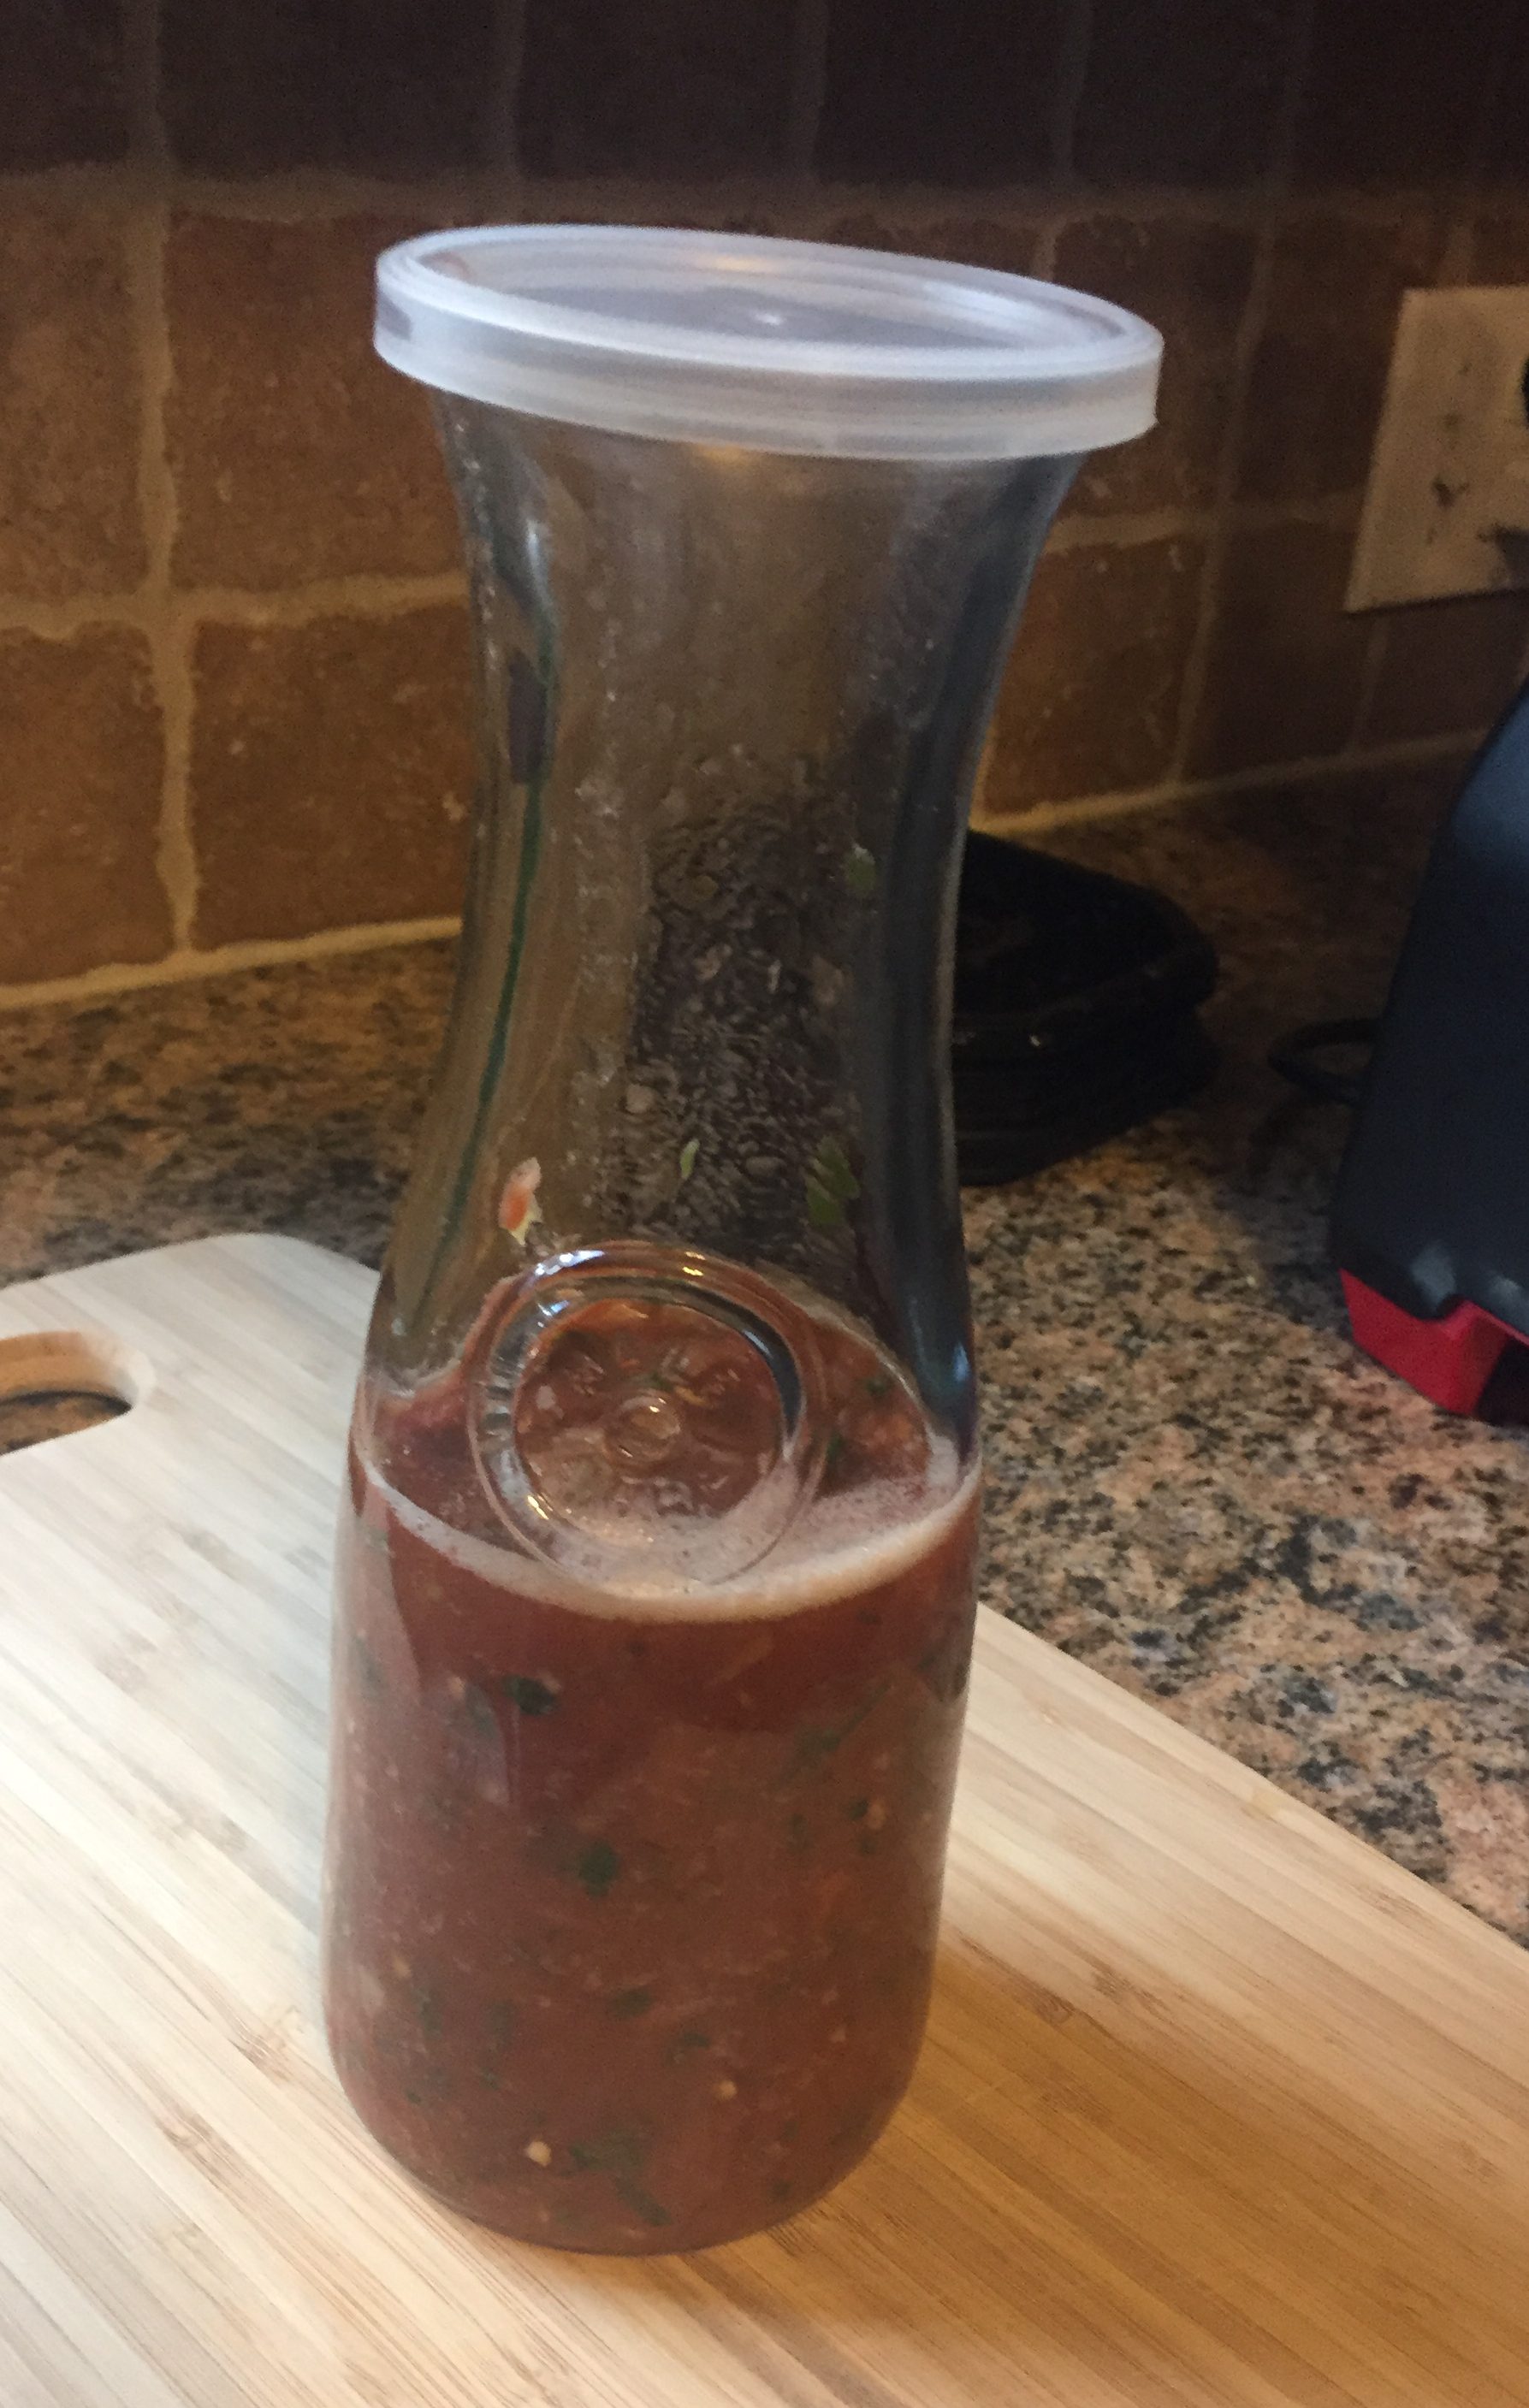
And so, after all these months, the first recipe on deck is one that is perfect for anyone who has a late-summer garden overflowing with veggies: the Green Chop Salad.

This salad is deceivingly flavorful and packs a spicy punch. Originally based on a recipe we found to help us use up an abundance mint taking over our garden, we made some adaptations that have made it a perfect one-bowl, make-ahead meal that’s absolutely ideal for busy summer nights. Also, it’s really green. Seriously. You’ll see. It’s called “green” chop salad for a reason.

Now despite it’s tranquil green-ness, I will warn you that this dish is spicy (and gets hotter as you let it sit and marinate!)…because DANG if one thing has changed in three years of marriage it’s that Tom has really grown in his tolerance of spicy foods*. This is a treat for me as I love to make things spicy, but if that’s not your jam than simply de-seed the jalapenos and use less chile powder. Easy peasy…don’t be scared!

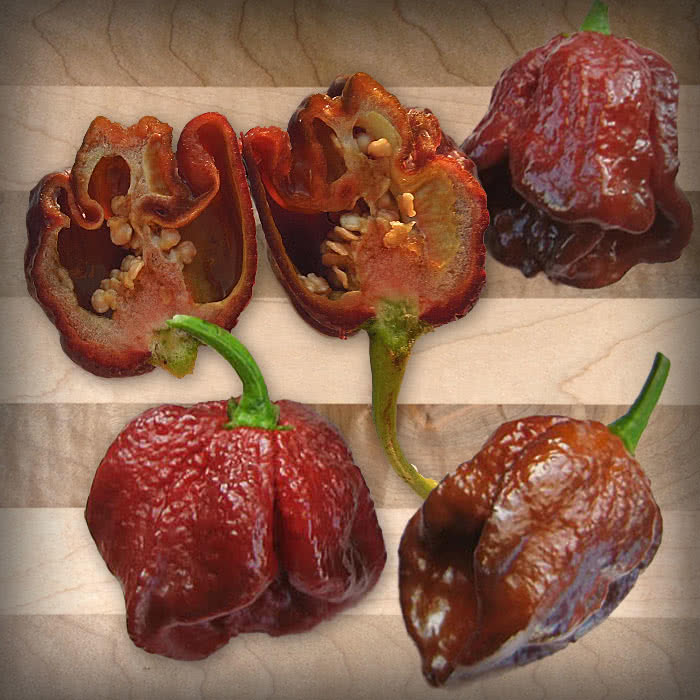
[*I have to be careful not to take this excitement too far. I tried to make a red sauce with a 7 Pot Douglah two weeks ago and when I was sweating the peppers with the onion I may have accidentally made our kitchen a hazmat zone where we couldn’t be in the kitchen without having a terrible coughing fit from the oils in the air. Whoops.]

7 pot douglah: just, you know, casually the third hottest pepper in the world. maybe not the greatest for a weeknight dinner’s red sauce…

This chop salad is in our meal planning rotation almost weekly and it’s perfect to make ahead and have for lunches all week long. The combination of the hearty veggies plus the protein in the chicken/sunflower nuts make this salad surprisingly filling and satisfying despite having very, very little carbohydrates. And if you don’t have the veggies available below? No problemo. Swap out for whatever crunchy veg you have on hand.

Lastly, I gave this recipe to a coworker and she used it all summer-long as great side to bring to the season’s many BBQs and potlucks. It really is great for groups–especially those with special dietary needs. Feta is usually okay for the dairy-free and it’s a safe bet for those with carbohydrate and sugar restrictions. You can even ditch the chicken for vegetarians/vegans in your life 🙂

Long story short? I have a feeling you’re going to love this one just as much as we do.

| Green Chop Salad |

Serves: 4 Tom’s or 6 Alaina’s

Ingredients:

For the salad:

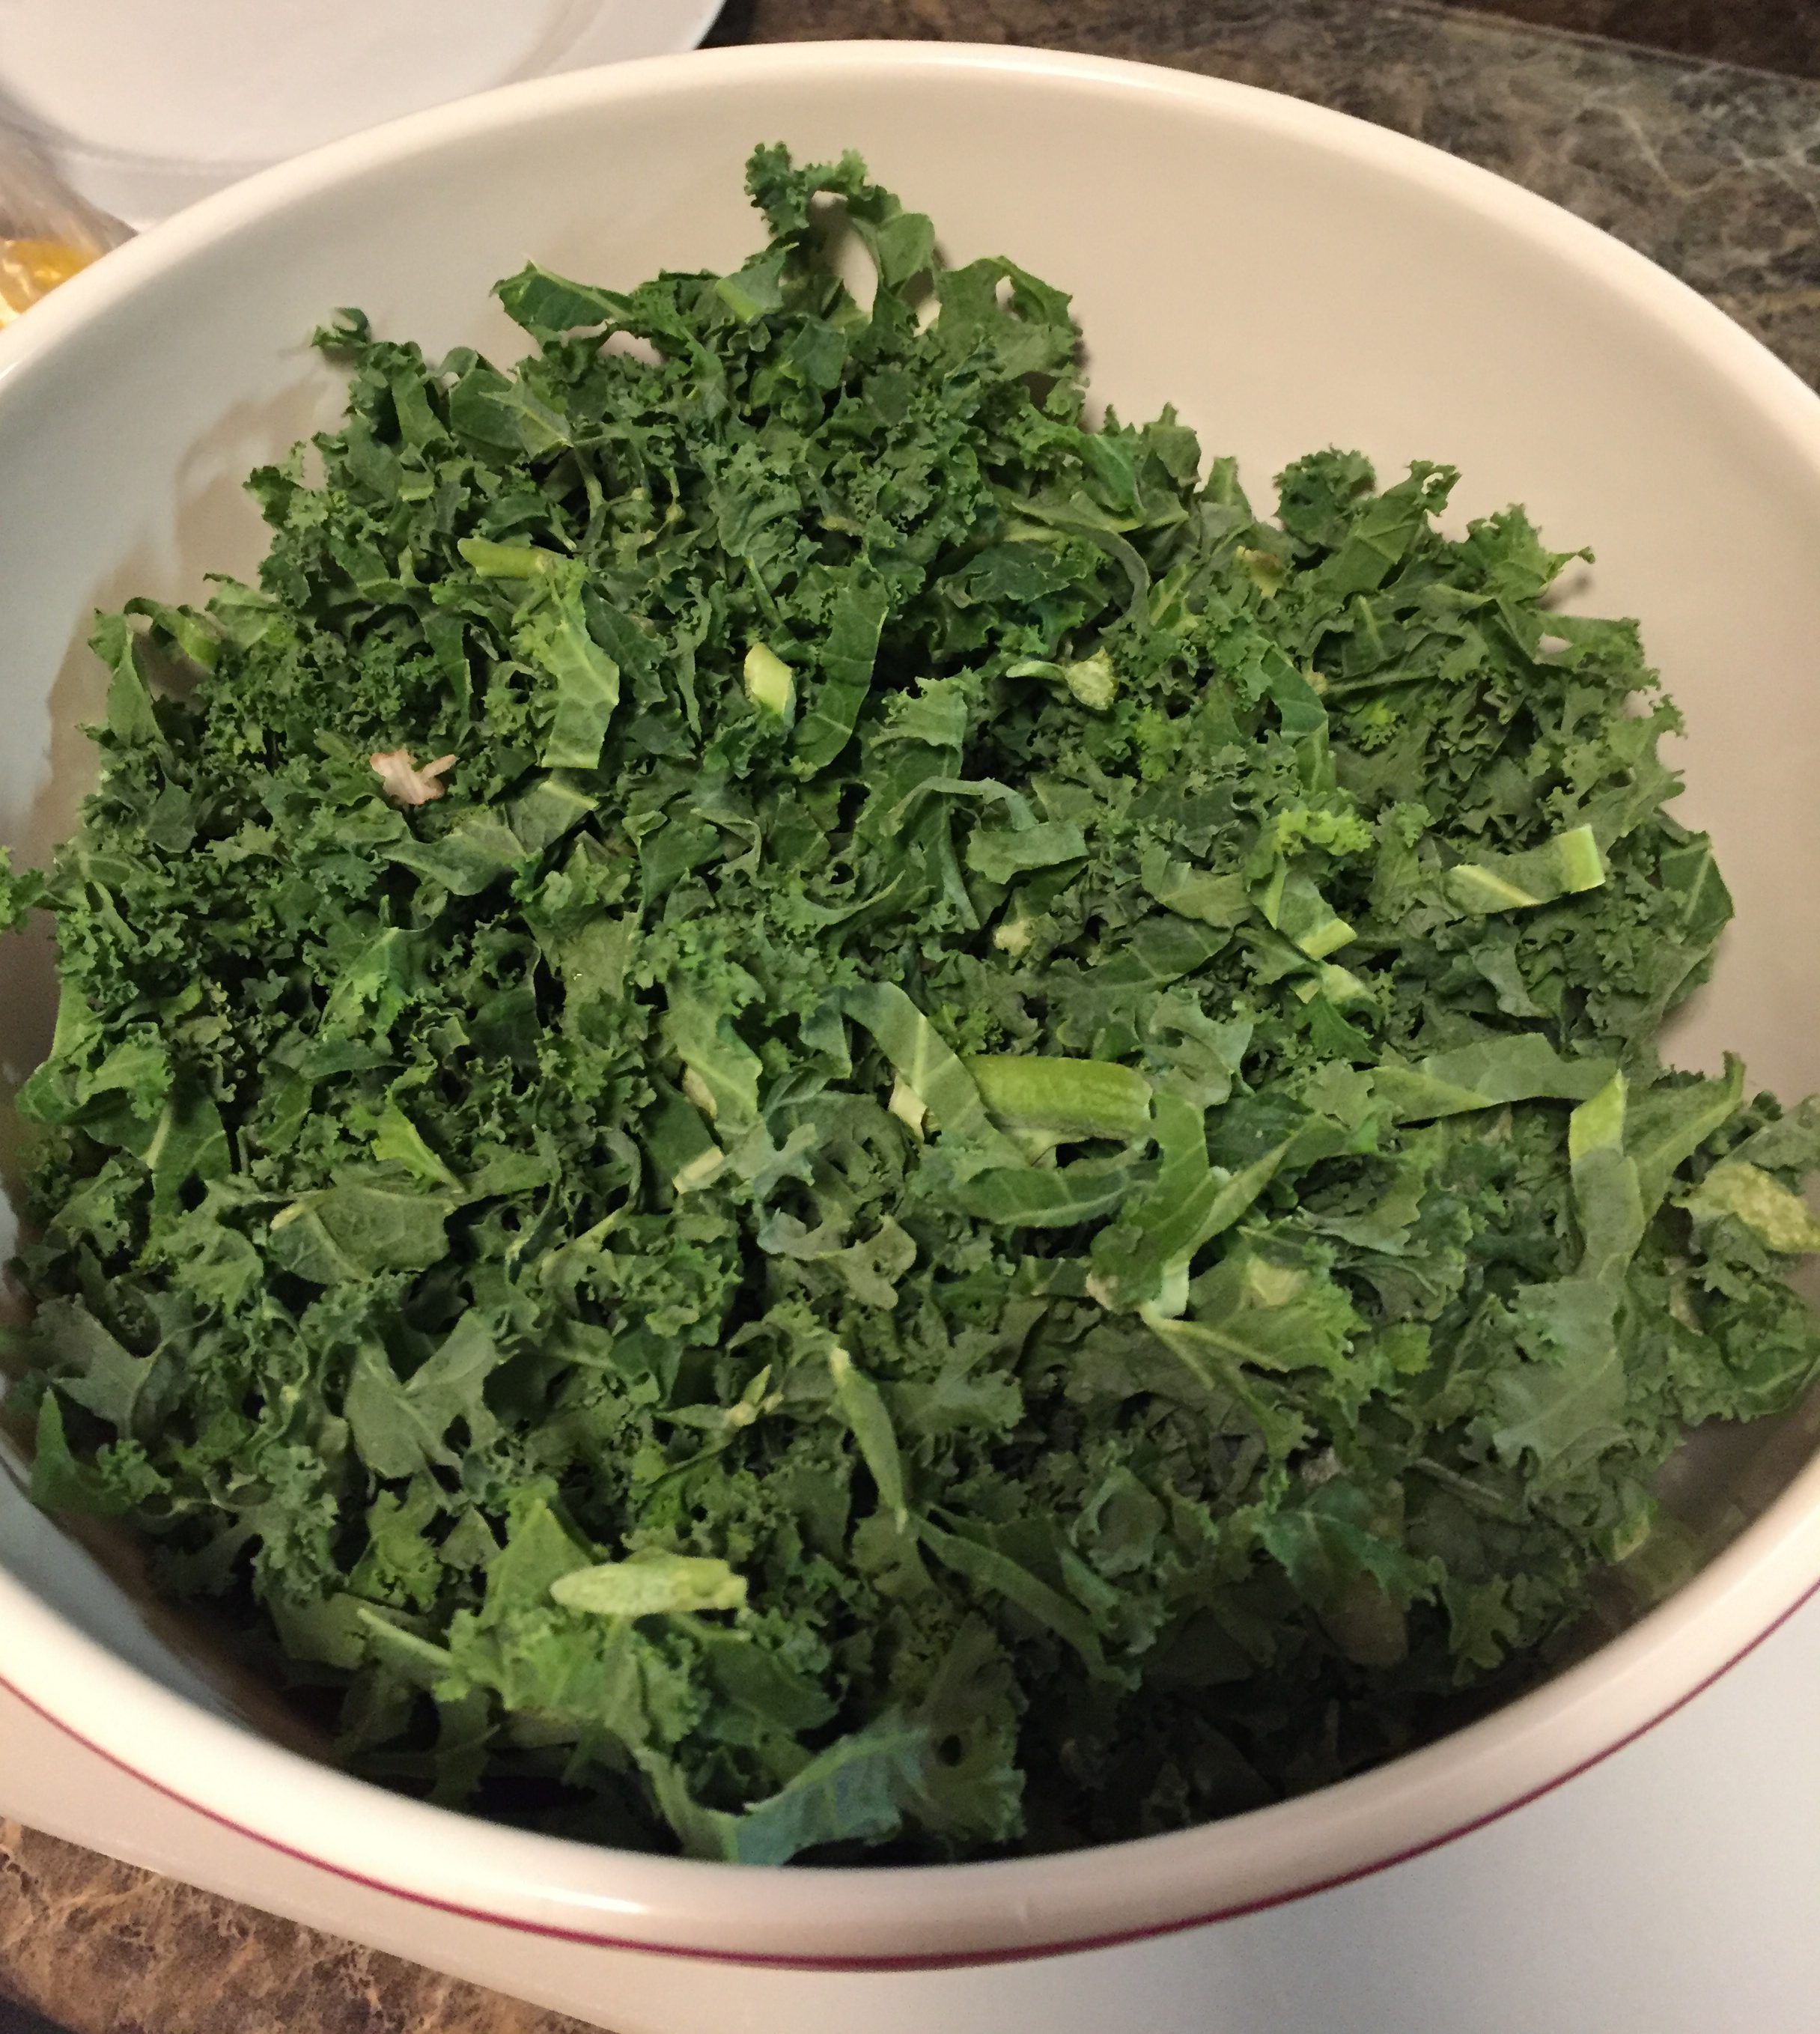
  • 2 cups chopped cucumber (~ 2 cucumbers, de-seeded)
  • 2 cups chopped celery (~1 package of celery)
  • 1 ½ cups chopped green beans
    • I use one bag of Archer Farms fresh green beans and it’s perfect…otherwise just find a friend who grows some!
  • 1 ½ cups chopped green pepper (~2 green peppers)
  • 2 cups cooked and chopped chicken breast (~2 medium chicken breasts)
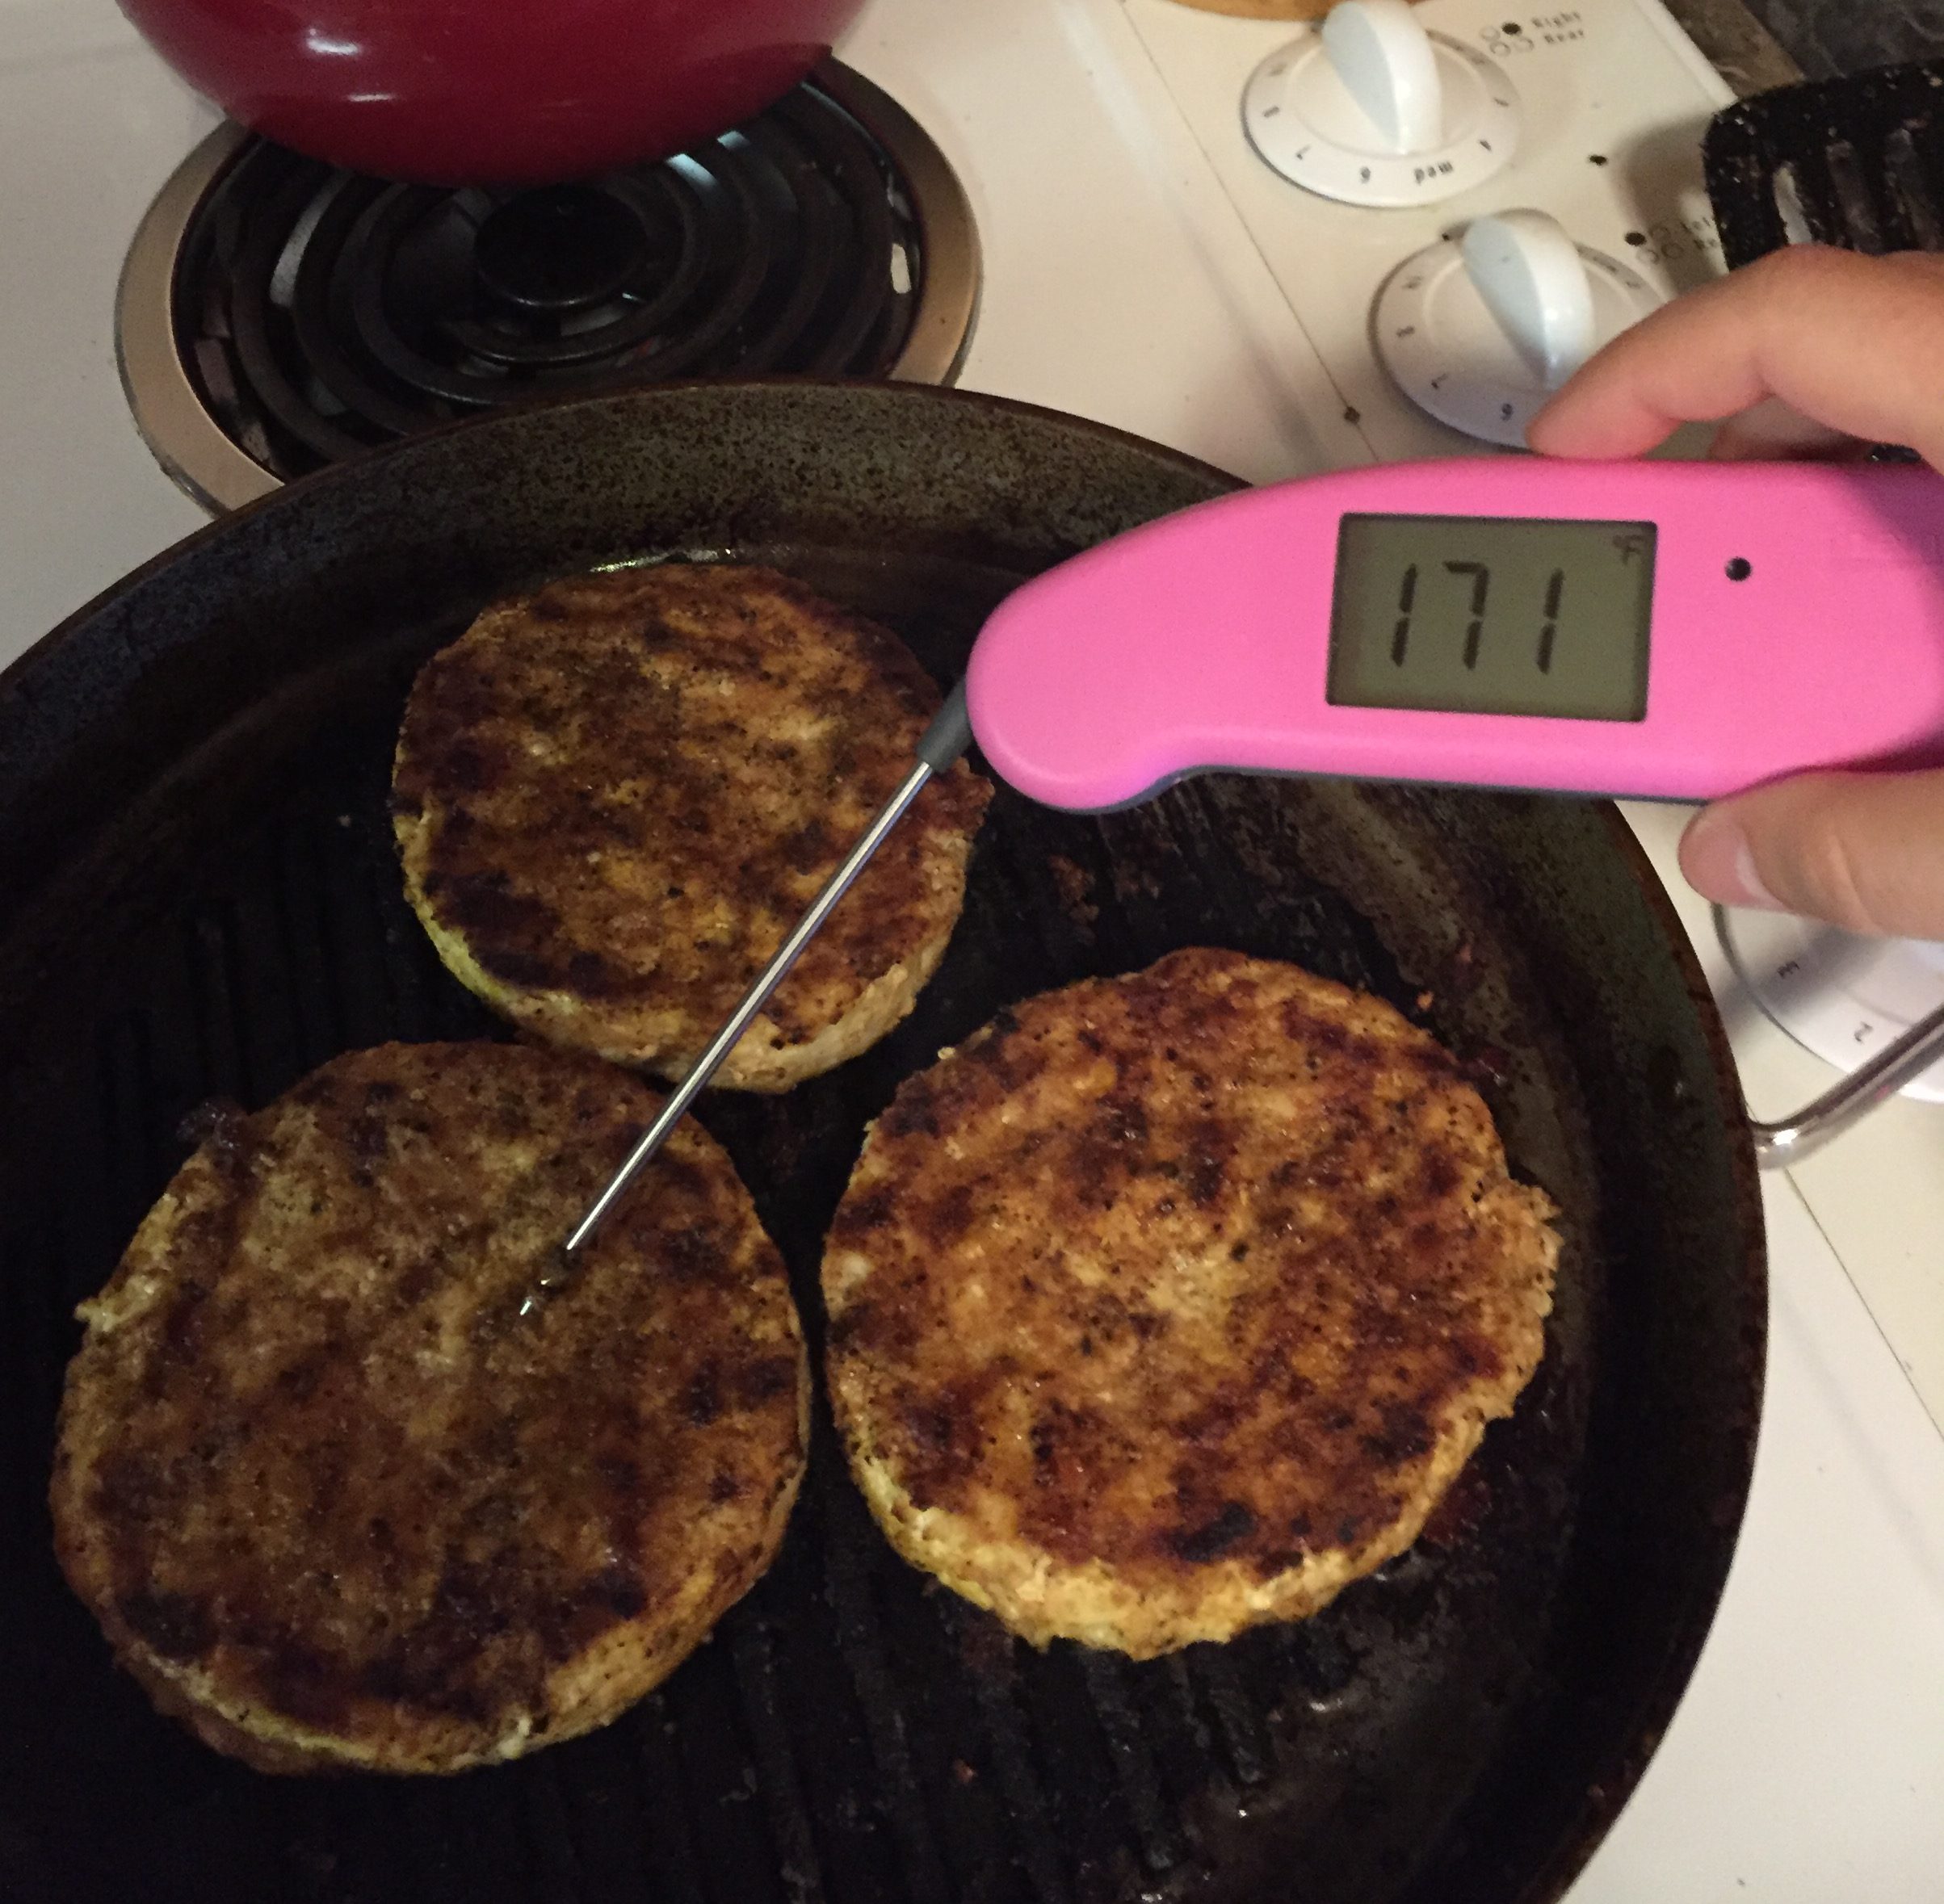
    • We usually just grill up a bunch of chicken on Sunday for use in all our meals that coming week. That said, you can use any cooked chicken—from rotisserie to canned—in this salad. I just love the little charred bits from the chicken on the grill! 
  • 2 finely chopped jalepenos
    • Feel free to de-seed these if you’re scared of spice…otherwise leave them in!
  • 2-4 tbsp. finely chopped mint leaves
    • I always add more…mint is basically a weed and we always have a TON to use up!
  • 2-4 tbsp. finely chopped chives
    • Again, chives are basically a weed in our garden…feel free to use more/less based on what you have or substitute scallions or sweet yellow onion.
  • ¾ cup crumbled feta
  • ½ cup roasted + salted sunflower nuts

For the dressing:

  • 3 tbsp. olive oil
  • 3 tbsp. lime juce
  • ½ tsp. kosher salt
  • ½ tsp. pepper
  • ½ tsp. chile powder
  • ¼ tsp. cumin

Directions:

  • Combine all of the chopped vegetables, herbs, chicken, feta, and sunflower nuts in a large bowl
  • Whisk together dressing ingredients in separate small bowl
  • Pour dressing over salad and combine until well-coated—adding more olive oil/lime juice as needed to coat well
  • Taste (the best part!) and season with additional salt/pepper as desired…and maybe some extra sunflower nuts. Just because they’re yummy.

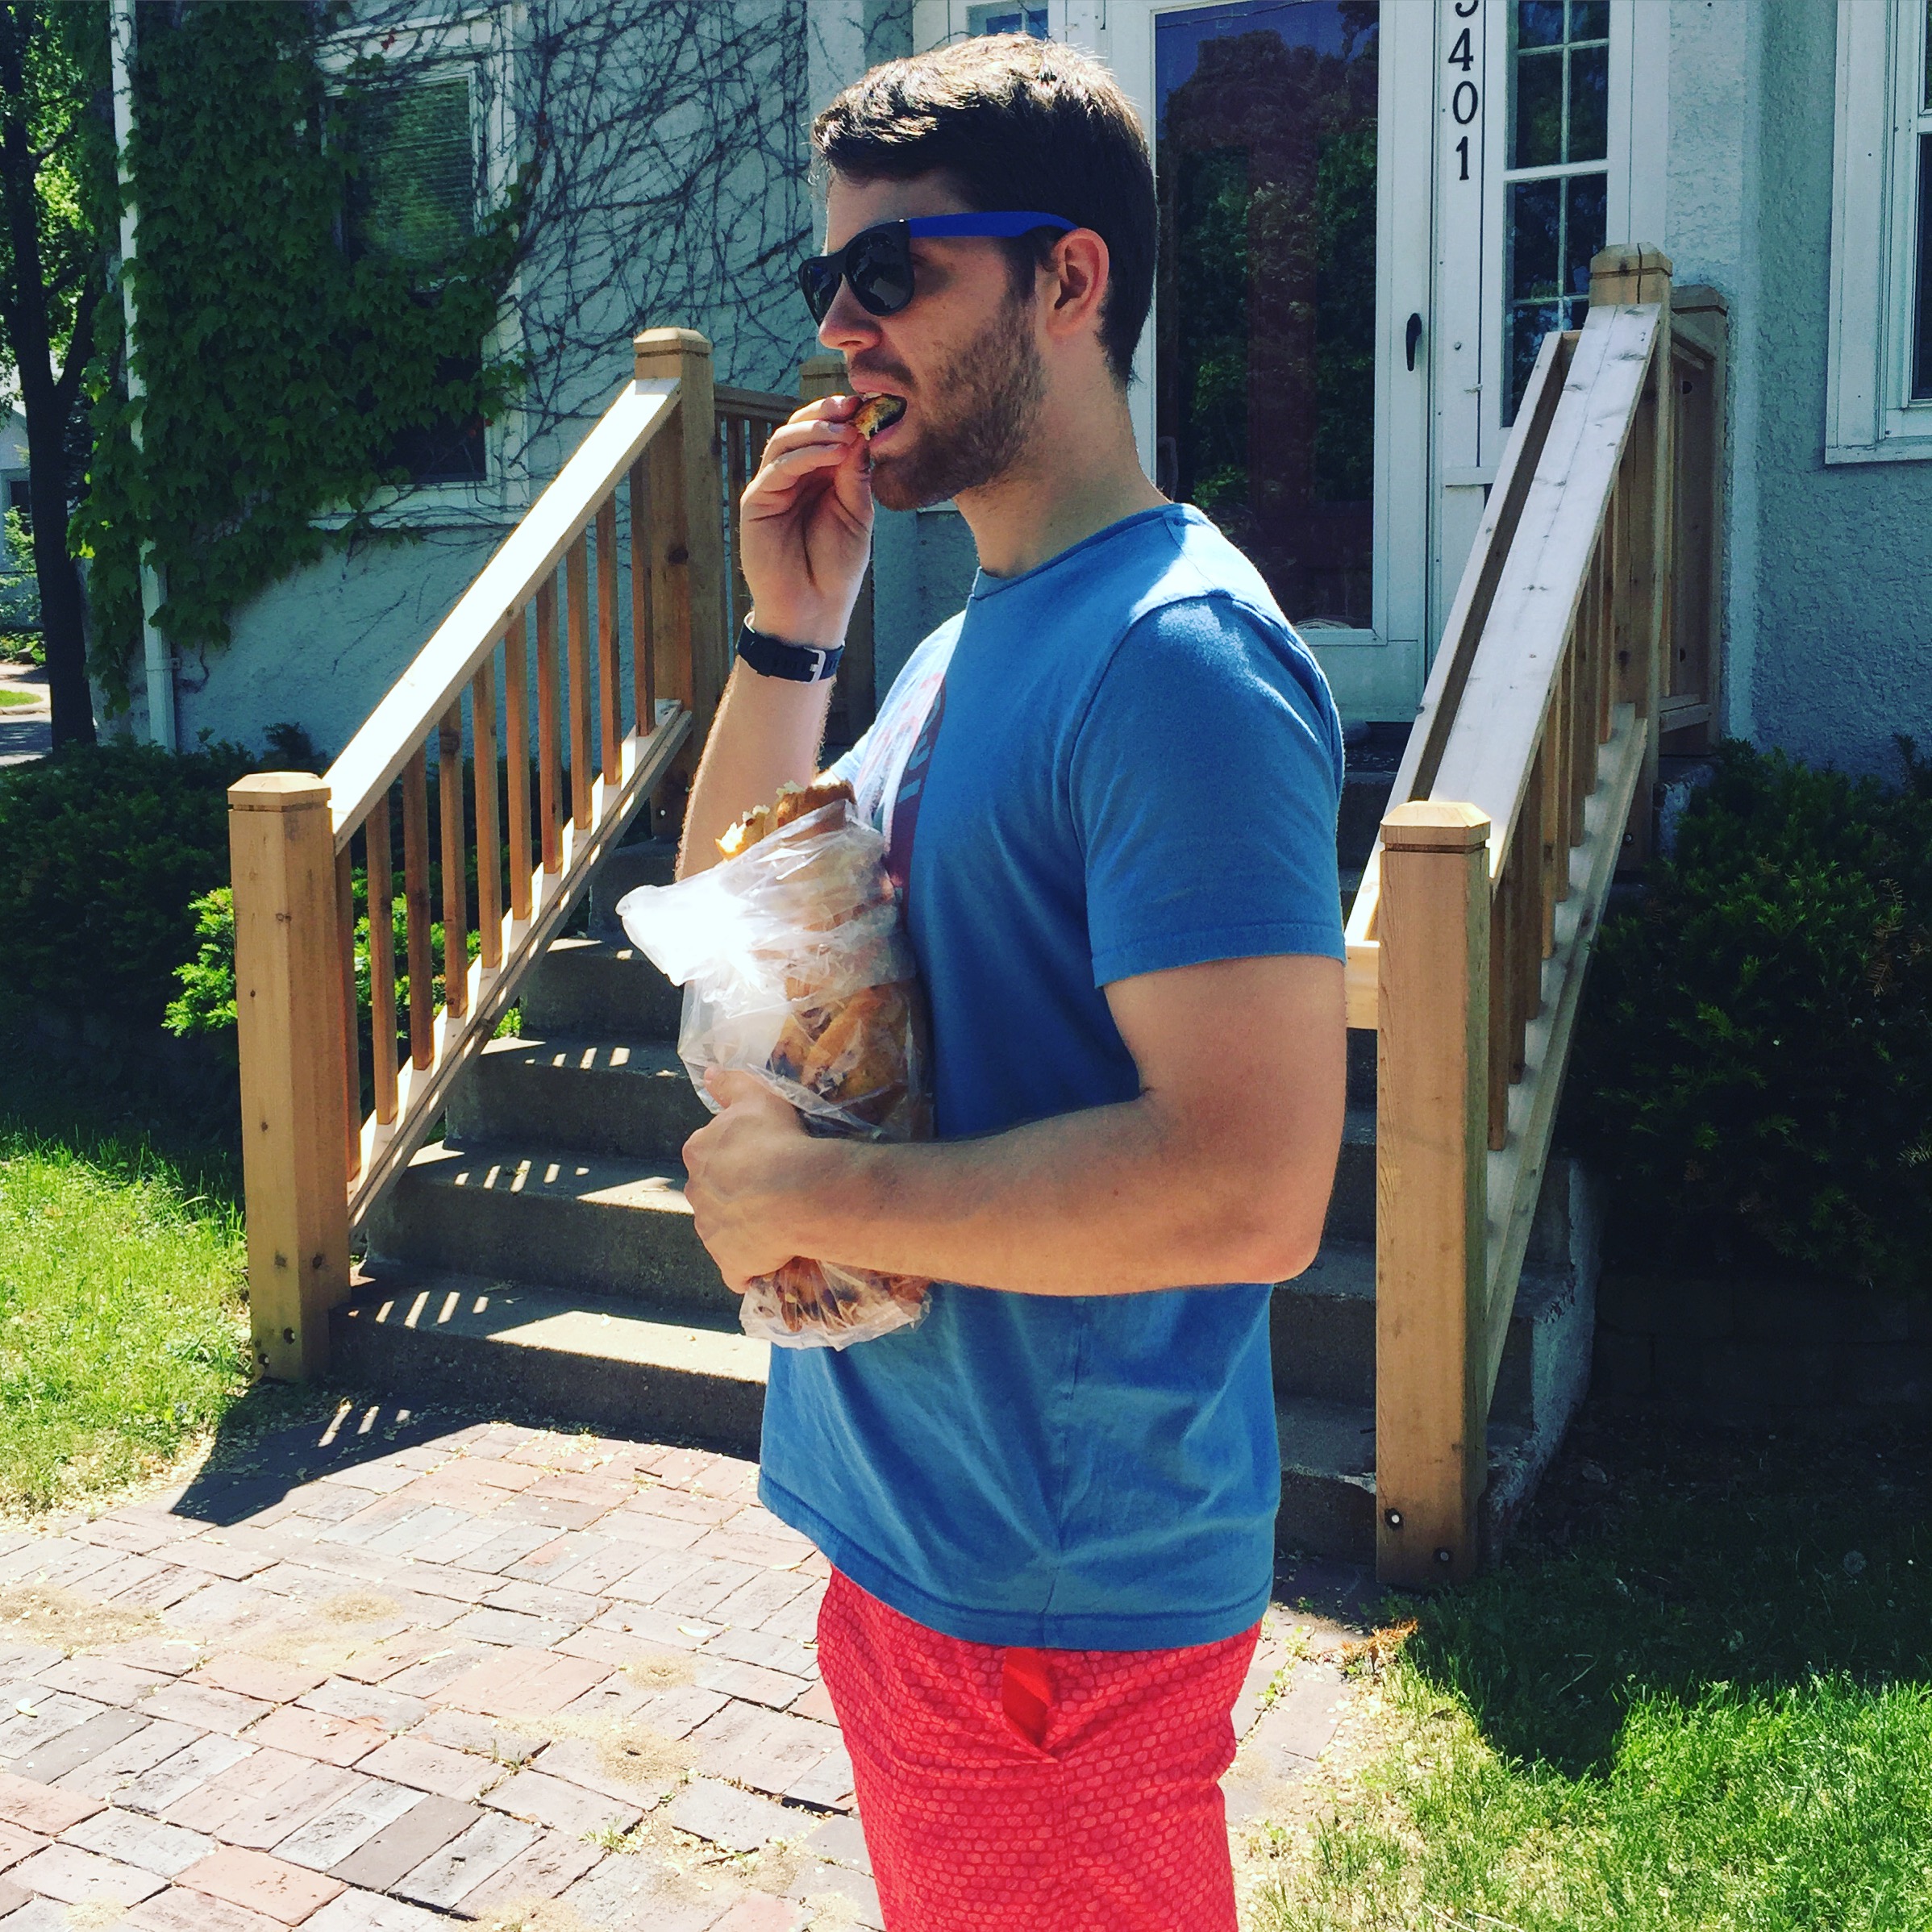
Now I know you’re going to enjoy this salad…maybe even as much as I enjoy the fact that Tom drinks coffee now. It was always my dream to have a partner that I could stroll around the lakes and sip coffee with, but Tom has taught me that sometimes reality is even better than your dreams.

How? Well, it turns out my dream was missing a critical component: a buttery, flaky chocolate croissant.

Here’s to making many more culinary compromises…all in the name of love.

xoxo,

alaina

love letter

some write love letters, i bake bread.

As an avid fan of love languages, I fully believe that understanding your own and your partner’s love language is the key to a successful relationship. For instance, my love language is words of affirmation and Tom’s is quality time—knowing this helps us love the other in a way that makes them feel most fulfilled and truly loved.

Image result for the five love languages
if you have not read this book, at LEAST take the assessment IMMEDIATELY. it will change your life. http://www.5lovelanguages.com/

That said, as much as I believe in Dr. Chapman’s list of five love languages (words of affirmation, quality time, physical touch, acts of service, and gifts), I think that Tom and I have realized we have our own special love language: food.

Yes, I’m serious.

Tom and I both love food…perhaps in different quantities….but, by golly, we BOTH are food-obsessed. We love to eat it, cook it, buy it, grow it, think about it, watch TV about it, and on and on and on. I mean, in our marriage “date night” isn’t about what we’ll do it’s about what we’ll eat!

Image result for zumbo's just desserts
our latest food-related TV obsession: australia’s baking competition called “zumbo’s just desserts” on netflix. it gets slow at times, but then we get to practice our aussie accents…so it’s all good. plus, “gigi” is a completely unnecessary character who just yells “PUSH, PUSH, PUSH!” and makes us collapse into giggles for hours. #marriedlife

If you’ve read this blog before, you also know that preparing food in a way that Tom can enjoy and that I can guiltlessly eat is a major focus for our relationship. It is truly an act of love the way we both give and take to ensure the other leaves each meal feeling full and satisfied. I am constantly thinking about how to make low-carb/low-sugar meals feel hearty and Tom is constantly keeping an open mind to what his favorite meals can look like (ie: sloppy joes out of minced veggies? yes, it’s a thing in our household)

When I look back on how far we’ve come in two years of marriage, I could almost cry. Being two food-obsessed individuals with very different ideas of what dinner should be like was really hard on our relationship. This blog was me trying to document what we were trying, thinking, and failing at (cough, cough–chickpea cookie dough—cough, cough) in this journey to find food that would “marry our tastes” and it’s amazing how far we’ve come.

Image result for chickpea cookie dough
looks good. it’s NOT.

But here’s the deal…it’s not always about marrying tastes. Sometimes, every once in a while, it’s about indulging your spouse and just thinking about what makes them happy. While our balanced menu works 99% of the time, there is something special about throwing compromise out the window and making Tom food that makes his heart (and stomach) sing.

In other words, me making Tom something to enjoy that’s just about him and what he likes is basically my version of a love letter.

And my most romantic love letter yet? Beer bread.

Yes, you heard me correctly. Bread made out of beer. Two things I do not (or rarely) consume. But that’s the beauty of it.

And you GUYS—this bread is good. It’s my grandma’s recipe and is literally as easy as 1-2-3.

There’s NO compromise for this recipe—it’s as simple as combining my husband’s three favorite food groups that he rarely indulges in since he married me:

  1. Carbs
  2. Sugar
  3. Beer
    • And because this is my version of a love letter to Thomas, I don’t just use ANY beer. I use his favorite: Summit Saga. Details matter, friends! 
Image result for summit saga
tom’s absolute FAVORITE.

| Thomas’ Beer Bread |

Serves: 8 Tom’s or 16 Alaina’s

Ingredients:

  • 3 cups self-rising flour
    • SELF-RISING not all-purpose! This is critical in getting the bread to rise properly
  • 4 tablespoons sugar
  • 12 oz. room temperature beer (ideally, Summit Saga)

Directions:

  • Pre-heat oven to 350 degrees F
  • Combine all ingredients in a medium mixing bowl
    • Note: I recommend using a strong wooden spoon or spoontula for mixing—this dough is stiff!
  • Pour dough into a greased loaf pan
yay! how easy was that?!
  • Bake for 55-60 minutes
kinda dark, but you get it. it’s an oven.
  • Cool bread in the pan on a cooling rack for one hour—then remove loaf from pan and allow to completely cool before serving

    patience is hard. i know you want to eat it.

Now while this bread is my love letter to Thomas, I wholeheartedly believe giving or serving this bread to anyone is a way to show people that you care for them. While simpler-than-simple to make, this bread is the epitome of comfort food and shows that you took the time to craft something from your hands (and from your heart) for the other person.

just LOOK at that crumbly goodness.

We’ve made this bread to welcome new neighbors, to serve at dinner parties, and to even thank our friend Jake for fixing our garbage disposal. It’s crusty exterior and oh-so-soft and crumbly interior is a reminder of just how good the simple things in life can be.

so. many. delicious. textures.

On top of all that, it’s perfect to serve as a side with most winter meals, but also outstandingly delicious simply toasted with butter for a quick breakfast. It also freezes really well—I have been known to make this bread for Thomas and freeze individual slices for whenever our dinner needs a little more oomph to make it more filling for him.

basically tom’s version of heaven: warm, toasted beer bread topped with salted butter

As Thanksgiving is rapidly approaching (which by the way, I JUST realized it was next week. When did this happen?!), it’s a time to be thankful and think about how blessed we are to have people in our lives that love us. For me, it’s a time to make Tom some beer bread and show him love through our shared “food” love language.

{Note: This bread is also a super good last-minute side for Thanksgiving. Just throwing that our there in case anyone else got thrown off by how soon Turkey Day is approaching! }

PERFECT thanksgiving side….and chances are you already have all the ingredients in your pantry!

That noted, I did share with you that my personal love language is words of affirmation. And due to that, I would be remiss if I didn’t combine Tom’s beer bread “love letter” with how I know how to show love best: words.

To be frank, Thomas is the most selfless, genuinely kind person I have ever met. He constantly puts the needs of others, especially mine, in front of his own with absolutely no hesitation. He married a woman who literally tries to make cookie dough out of chickpeas and tries to tell him spaghetti squash is really just as good as spaghetti…even though all he ever actually wants is real pasta, white bread, and creamy mashed potatoes. He drives me to my bus stop every morning and always does the dishes simply because he knows how much I hate them. He warms up my side of the bed every night and has already learned all the words to Taylor Swift’s entire album…because he’s allowed me to have it repeat for an entire week. He’s an outstanding son, brother, “Uncle T-Rex”, “bomba”, friend, co-worker, and teammate, but more than anything he’s an amazing husband with killer dance moves and hips that just don’t lie.

for real. this dude is just EVERYTHING. he even makes cheap hot pink sunglasses look good.

This Thanksgiving I am so thankful for the greatest gift God has ever given me: my husband.

Here’s to making many more culinary compromises (just not today)…all in the name of love.

xoxo,

alaina

on fire

this salsa is ON FIRE…just like tom’s dance moves

Having a house has been a big deal for us for a lot of reasons (no more sharing laundry facilities! a garage! storage! a yard!) but for me I knew what I was most excited about having a house:

HAVING HERBS AT MY DISPOSAL FOR 1/100TH OF THE COST OF THE GROCERY STORE!

yes, that is TWO pots of basil

So here’s the deal–I love pesto. I love it so much. I will share my recipe sometime when I actually remember to take pictures of what I’m doing and how much I’m throwing into the food processor willy-nilly. But in the meantime, let my TWO HUGE POTS OF BASIL show you how much I love pesto.

{Note: I realize it is ironic for a girl that doesn’t eat pasta to love pesto so much. I usually cheat around once a year and make the most delicious al dente bowtie pasta with a heavy cream pesto sauce that would knock your socks off…crap…now I’m drooling…}

Anywho: So of course I planted two pots of basil…but I got a bit distracted when I was wondering the aisles of Home Depot picking out my herbs this spring. So instead of planting two basil plants, chives, rosemary, and mint like I planned, I instead decided that we would get MUCH more use out of jalepeno and serrano plants instead of the rosemary and mint.

So now fast forward a bit…this summer I have had basil and chives coming out of my ears and then these two pepper plants that were basically sun and water hogs (#lame). All season long these pepper plants just got taller and taller and produced NO peppers (#superlame). I was about ready to replace that pot with more basil (I know, I have a problem) when BOOM it happened: MY PLANT HAD PEPPERS!

And not just a few peppers…as of this week I all-of-a-sudden had like 20+ peppers that I needed to use.

Cue what I have dubbed “pepper panic“.

So, after I almost killed Tom adding three serranos to our eggs one day, I decided I needed to get creative.

Now, before I go any further, it’s worth noting that I come from a family that likes things so spicy “if your eyes aren’t watering it’s not spicy enough” and Tom comes from a family that prefers things more “Minnesota spicy.” Big difference.

While Tom’s taste buds have come a loooooong way since we’ve been a couple (primarily because my family doesn’t know how to make foods like chili and buffalo wings without at least a few ghost peppers), we still are working on finding a compromise for the appropriate “spice level” for our household.

So when I decided that making salsa would be the perfect way to use up my abundance of peppers and overgrown chives, I had to make sure I was careful. I wanted a salsa with a healthy kick…but not so much of a kick that it made my poor husband sick.

So…where’s the compromise?

Here’s our answer:

  • Start with a “restaurant style” (read: fresh and mild) recipe base that has lots of fresh tomatoes to balance out the heat intensity
    • I use the Pioneer Woman’s recipe as a base–that woman can do no wrong. I also sort of want to be her best friend…even if she does do business with Walmart. Sigh. 
Fun fact: For a long time, Tom thought the Pioneer Woman’s name was Julia Child. Oh my…I love that man.
  • Use lots of peppers, but de-seed half of them…and don’t add anything hotter than a serrano
    • All of the heat in peppers is in the seeds and the membrane–if you like it more mild, just discard the innards! 

| salsalaina |

{see what I did there? it’s very fun to say out loud. I even sometimes add a shimmy when I say it. because, well, why not?}

Serves: ALL OF THE PEOPLE. I swear this makes so much. At LEAST 10 Tom’s &  15 Alaina’s–it’s great for when you’re having people over!

Ingredients Needed:

  • 3 small onions, peeled and quartered
  • 1 bunch chives (~1/4 cup)
  • 1 bunch cilantro (~1 cup), de-stemmed
  • 2 jalepenos, stems removed
  • 3 serranos, stems removed and de-seeded
    • If you want it hotter, leave the seeds in!
  • 1  28 oz. can whole peeled tomatoes
  • 2 cans low-sodium Rotel (you don’t need that salt!!)
  • 2 tsbp. lime juice (~juice from one lime)
  • 1/4 tsp. cumin
  • 1/4 tsp. sugar
    • I know, what am I thinking?! Trust me–it’s needed to break the bitterness of the canned tomatoes. And broken out over 20+ servings…it’s nothing! 
  • 1/4 salt, plus more to taste

Directions:

  • Prepare your ingredients and be extra careful touching anything after you’ve touched the peppers–especially if you touch the seeds!
    • I may have learned this the hard way when I was younger and after cooking with ghost peppers hopped into the shower to wash my hair. MY SCALP WAS ON FIRE. BAD, BAD IDEA. 
  • In a large food processor (at LEAST eight cups!) or Ninja-like blender, add all the ingredients in the order listed (it will help with the mixing)
    • As Ree says in her recipe I use as a base, you can always process the ingredients individually/in groups and mix together in a mixing bowl. This is why I love her recipes…so simple, yet so genius. Why overcomplicate life? 
  • Pulse until ingredients are well-mixed, but not pulverized to a drippy liquid (~10-15 pulses)

  • Taste and add salt to your own preference
    • If planning to eat with chips (which you should be), make sure you taste with a chip vs. just using a spoon. The chip will add salt so you don’t need to add as much to the salsa.
  • Store in an airtight container
    • I like storing mine in carafes–perfect for entertaining or for whenever I get a jonesing to put it on eggs, a burger, nachos, etc.
    • It will last about a week in the fridge
we have SO MANY CARAFES left over from our wedding. from cereal then to salsa now–they work for everything!

This salsa is so good. It’s not too hot for people who can handle a little spice and it’s not too tomato-y for people who like it hot. It’s literally the perfect salsa for entertaining.

In fact, I’ve yet to serve it to company and NOT have the bowl look like this:

is clean bowl club a thing? it should be!

And, in case you’re wondering, Tom and I love it too. Since it makes so much, I end up stirring it into soups, using it as a sauce for chicken, pouring over eggs, and so much more. That said, we usually just buy a big bag of Way Better Sweet Potato Chips and go to town…because, why not? Life is short.

for the record, I do not believe that “way better chips” are all that better-for-you. that said, they ARE delicious and complement this salsa perfectly.

As an FYI, I’ve also had success freezing it…but, in all honesty, it’s never the same as when it’s fresh-made. So you should really just eat it all up…or find some friends who will. I guarantee you it won’t be hard!

That said, word of caution: make sure you don’t eat too much chips and salsa before you have dinner…or you’ll end up like Tom during date night last week:

poor guy, he was so sad he couldn’t finish his meal. up until this day, this had LITERALLY NEVER HAPPENED IN THE HISTORY OF OUR RELATIONSHIP.

I don’t think Tom not finishing his dinner this one time will keep him from eating this salsa in the future. At least I hope not…my pepper plant is still going crazy. There’s going to be lots more salsa in his future!

Here’s to making many more culinary compromises…all in the name of love.

xoxo,

alaina

welcome home

home sweet home

It took moving into our new home to realize this, but it’s true: it turns out my concept of “marrying tastes” extends beyond just food. It also applies to taste in home decor.

I’ll explain, but before I do, I need to let you know something upfront: there’s no recipe in this post.

I know, I know, what’s wrong with me? Where’s the low-sugar-yet-satisfying recipes?! If I’ve let you down, I’m sorry, but the reality is that all I’ve been making for two months is spinach-based salads. Fo’ real–the two of us go through an ENTIRE BAG OF COSTCO SPINACH each week.

Yes, that is TWO AND A HALF POUNDS OF SPINACH

And, unless you tell me otherwise, I didn’t think any normal human beings would be interested in the spinach variations I make on a weekly basis. We literally grill 6 chicken breasts every Sunday, chop ’em up, and that (plus the spinach, of course) becomes our meals (lunches AND dinners) for the week:

  • Sunday: Caprese Chicken Spinach Salad
  • Monday: Apple Feta Chicken Spinach Salad
  • Tuesday: Strawberry Goat Cheese Chicken Spinach Salad
  • Wednesday: Chicken Cobb Spinach Salad
  • Thursday: Spinach & Goat Cheese Omelets
  • Friday & Saturday: Usually a date night…where Tom proceeds to typically make up for the carbohydrates he missed out on from the previous week in one sitting. Bless him.

I know what you’re thinking: Tom’s a saint. He eats salads every day with a smile on his face…even though we both know he’d rather be eating pasta, potatoes, and pizza. And let me just say–I totally agree. He is a saint.

so. many. salads.

Also, if I’m being honest, I think the only reason he puts up with it is since I’m deficient in like everything. If you’ve ever spent the day with me you’ve seen my pill case. Yes, pill case–the one with the arthritis-friendly push buttons and broken out by days of the week. You’ve seen them I’m sure…at your grandma’s house.

trendy, right?

So while Tom may get sick of spinach (and let’s be honest, I do too), I think he puts up with it since it’s so full of additional vitamins (on top of the bazillion I take a day) that are good for my anemia, leukopenia, low b12, and other various deficiencies. Add that fun to the fact that my blood sugar is all wackadoodle and it’s pretty much official: I’ve got some bad blood…just not the kind Taylor Swift sings about.

for the record, i love taylor swift. haters gonna hate.

Anywho–that’s enough about our spinach intake for one blog post. So lo siento about the lack of recipe…let’s get to the part about the other way we’ve been marrying tastes lately.

As we quickly deciphered within days of moving in, it turns out Tom and I have different design aesthetics that no amount of Fixer Upper re-runs were able to prepare us for.

Basically, here’s how I’d break down our respective design POVs:

  • Tom: A home is a place to display your things; matching isn’t overly important
  • Alaina: A home is a place to organize your things; cohesion is insanely important

So why is this important? Well here’s some examples:

  • An extra drawer in the kitchen:
    • Tom sees a junk drawer
    • I see precious space that I can use in the future and abhor the idea of there being such a thing as a place for “junk” in my house
  • Built-in shelves:
    • Tom sees it as a perfect opportunity to show off his whale collection and sets them up there immediately
    • I see a bookshelf for our future kiddos and freak out that there’s whales on display in my house
  • Multi-colored walls:
    • Tom barely notices it
    • I feel like I live in a loony bin until I can paint all the walls the same soothing greige color
ceramic whales, the perfect addition to any home…?

I admit this makes me out to be a crazy person, but I think you get my point. Our new version of our marrying tastes challenge became how we can mesh my desire to put everything away with Tom’s desire to show off the things he’s proud of.

So…where’s the compromise?

Here’s our answer (at least so far):

  • Neutrals + one color
    • Knowing I love neutrals but Tom wants our house to actually look lived in (not just beige and blah), we decided we would do the entire house in neutrals plus Tom’s favorite color: green. Luckily for me, green is a super easy color to pull off using plants!
  • Baskets, baskets, baskets
    • While I didn’t go so far as a making Tom go all Marie Kondo and decide whether or not each of his possessions bring him joy, I did help him do a good spring cleaning before we moved (for example, do you need multiple drawstring backpacks when you’re almost 30? no. you do not). My promise? If it moved with us, we’d find a place for it. Enter: baskets galore. We’ve got them in the office, the entryway, and the living room to ensure everything has a place and nothing is just sitting out. I get a house that’s clutter-free and Tom gets to have his stuff easily accessible in each room.
  • Do everything together
    • I wholeheartedly understand (and appreciate) that it is MUCH easier to some things on our own for efficiency’s sake when trying to decorate our home. That said, I have purposefully ensured that we decide together on everything we paint, hang, or purchase to ensure it’s something we both love. For one, it’s an activity we can do together (who wants to paint by themselves anyways?!) and Tom’s love language is quality time–a major win-win. But more importantly, it ensures that our home feels like our home–we both are equally invested in how our home looks and feels.
the other benefit of doing everything together is someone’s around to take pictures of the dumb things you do…like back into the freshly painted wall with your backside.

So while we may not have a solution for every little thing, I will say that doing the above three things has helped with our transition into a home and meshing our two styles and beliefs of what a home should be like. It’s avoided disagreements and either one of us feeling like decorating our home is a burden for one of us to shoulder and has instead become an insanely gratifying project that we get to partner together on.

So while we’re no Chip and Joanna and may be on-track to set a record for number of trips taken to Home Depot in one day, the steps we’ve taken to make our house feel like a home have really brought us closer together in our marriage.

our current record is five times in one day. FIVE.

Because let’s get real: when it’s 11PM and you run out of painter’s tape again, you need a shoulder to cry on. When you bite off more than you can chew in deciding to rip off the wainscoting, you need someone to give you a little bit of grace. And when it takes your literally twelve hours to install a closet organizer, you need someone to jointly curse the person who constructed such poor quality materials.

At the end of the day, you simply just need one person who knows you best and loves you unconditionally: your spouse

So while I still think I’m going to focus on marrying our food tastes instead of our tastes in home decor, I hope you enjoyed a sneak peak into our home. We’re proud of what we’re building together and I can’t wait to share more of it with you as we go along.

for example, here’s a sneak peak at our kitchen. you know how i love my bundts!

Oh, and if you’re wondering where Tom’s whale collection ended up? Don’t worry, it’s safe and sound: preserved in a see-through plastic bin that’s easily accessible to help decorate a nursery one day…and not a day sooner 🙂

much better, right?

Here’s to making many more culinary and more compromises…all in the name of love.

xoxo,

alaina

cookie cravings

peanut butter deliciousness with no refined sugar or flour? mmmmm…

I don’t know about you, but when life gets crazy…give this woman a cookie.

Now I know that sugar is not the answer when you’re not feeling overworked/stressed/tired/crabby…but dang, when those cravings kick in…I could care less. I want the dang cookie. Pre-diabetic body be darned!

If you couldn’t tell from my months-long hiatus from my beloved blog…I may or may not have been craving a few cookies lately. Between a long-undiagnosed sinus infection, some massive projects at work, traveling, and finally having an offer accepted on a house…we’ve been a bit busy. Add in a healthy dose of springtime activities kicking into gear (me coaching for Girls on the Run and Tom’s multiple softball leagues) and it’s become normal for Tom and I to spend more time chatting over email or text (or my beloved shared Google docs of to-do’s that keep me sane) than in-person.

on a side note…look how cute our house-to-be is! it makes the fact that i’m barely hanging onto my sanity lately TOTALLY worth it.

As you all know, I’m not going to succumb to my desire for a Tollhouse chocolate chip cookie every time the going gets tough. That being said, I am going to acknowledge that when paired with doing my best to get enough sleep and ensuring I’m still regularly working out…a cookie ain’t gonna kill me. That noted, it would still be nice if there was a cookie that I could eat and not feel guilty at all.

Meet this blog’s challenge: How can I make a satisfying cookie that fits my dietary needs and will also be thoroughly enjoyed by Tom (…primarily so I don’t eat them all myself)?

So…where’s the compromise?

Here’s our answer:

  • Swap typical cookie ingredient chocolate for one of God’s greatest gifts to humans: peanut butter (delicious and protein-packed!)
  • Ditch any form of refined sugar for unsweetened apple sauce (ensure it’s no sugar added, friends!)
  • Utilize cookie stamps (or your handy-dandy fork) to make a thin, yet cakey cookie that satisfies your eyes just as much as your stomach!

| Crave-Worthy Cookies | 

Serves: 6 Tom’s or 9 Alaina’s (18-24 cookies)

Ingredients Needed:

  • 1 cup natural peanut butter, chilled so it’s slightly stiff
    • As always, I love me some Market Pantry Natural Creamy PB

  • 3/4 cup no sugar added applesauce, de-liquefied
    • Note: Sounds crazy, but you simply place in floursack/tea towel (or even triple-layered paper towel if you’re in a pinch) and wring out. Then, voila! De-liquefied applesauce
  • 1 egg
  • 2 tbsp. all-natural honey
  • 1 tsp. vanilla
  • 1/2 tsp. baking soda
  • 1/4 tsp. salt
  • Cooking spray

 Directions:

First things first.: Get your oven on and sheet pan prepped…

  • Pre-heat your oven to 350 degrees F
  • Line a baking sheet with a silicone mat

Now make your delectable and delicious dough…

  • Combine all ingredients (minus the cooking spray) in a bowl in any which way you want…EXCEPT FOR ONE THING: ensure you dump the baking soda on top of the applesauce
    • Why? You need the baking soda to react with the acid in the applesauce to get the slight rise of the cookies. 

Now I know you’re thinking “this is so speedy!”…and I hate to burst your bubble…

  • Take your bowl of dough and stick it in the fridge to chill for thirty minutes. You want stiff cookie dough so the cookies hold their fun shapes. It’s worth it. Hang in their with me, friends. Go throw on an episode of you favorite half-hour sitcom and then come back.
    • Note: I recommend The Office or Park and Rec. Your laughing will distract you from how much you want to eat a cookie. Unless you watch Leslie Knope eat waffles..then maybe not…

Ding! Ding! It’s been thirty minutes! Let’s get these babies in the oven…

  • Using a cookie scooper, drop one inch balls of dough on a silicone mat-lined baking sheet about two inches apart

  • Once your sheet is full (about 12 cookies worth), grab a lightly greased cookie stamp or lightly greased fork (use cooking spray to grease) and press down on each ball to create a 1/4 to 1/2 inch high circular cookie (re-greasing as needed as you go)
    • Note: I LOVE MY COOKIE STAMPS. Bless my husband for knowing if Nordic Ware makes a new product I will love it–these were my Christmas present this year and they work FABULOUSLY for these cookies. 
i love you, cookie stamps
  • Bake for 15 to 20 minutes or until cookies are set–they will be slightly dark around the edges but will not be completely stiff

  • Cool cookies on the baking sheet for five minutes

  • Once five minutes have passed, use a cookie spatula to transfer the cookies to a cooling rack

  • After they’ve mostly cooled (about thirty minutes), place paper towel under the cookies and let them completely cool for about two hours
    • Why paper towels? Well, these cookies are primarily peanut butter so they’re a little oily when they’re warm. Let them cool on paper towels and you’ll keep a crisp cookie for later!
  • Complete above steps for remaining dough–it should make about another 6 to 12 cookies
  • After cookies have completely cooled (at least two hours), store in an airtight container with layers of paper towel between cookie layers
  • Eat cookies within five days of baking (and hats off to you if they actually last that long!!)

Now just look at these pretty cookies!

i eat you now, yummy cookies

These cookies are cakey, yet they have crisp edges that give them a little bit of a crunch that’s just p-e-r-f-e-c-t. It’s the same satisfaction you get from that fabulous  just-out-of-the-oven chocolate chip cookie…yet these cookies stay this way after they’ve cooled. On top of that, each cookie only has 3 grams of sugar and 5 grams of carbs…and a whopping 3.5 grams of protein!

You know what that protein means? I can actually be satisfied with TWO COOKIES. Yes, TWO!

{Note: 2 cookies. That’s the actual serving of Oreo’s…not that I ever actually just eat two. Let’s get real…they’re Oreo’s. I eat like five at LEAST. Praise the LORD I have these cookies to help with my cookie cravings}

{Second Note: Now that I’m thinking about Oreo’s, why do they put like 50 in a package? Does any human actually get 25 servings out of a pack of Oreo’s?!}

{Third Note: Does anyone actually buy the normal “stuf” Oreo’s? It’s the same price for Double Stuf which is arguably the perfect ratio of filling to cookie. Why do they even sell they normal “stuf?” So. Many. Questions.}

Dang you, Oreos for being so tempting and delicious! #baddiabetic

Crap…got off topic there thinking about Oreo’s. See friends? That’s why these “crave-worthy cookies” are so dang good–no temptation, no serving size deliberation, and most of all: no guilt.

And yes, in case you were wondering, Tom loves them too. I mean, he loves most food if it comes in large quantities (see Exhibit A), but still. He really liked these cookies and thought they paired perfectly with a glass of cold milk as an after dinner treat.

Exhibit A: Since the age of 8, Tom has always loved the sight of a “big dinner”

You can bet big money that these cookies will be one of the first items I make in our new house when we move in at the end of the month. Until then, I have our entire house packed up except for four plates, four bowls, four glasses, and a grill pan*

{*Note for Thomas: Sorry again babe that I packed everything up a full month before we moved. I appreciate you living out our vows and giving me a crap ton of grace even though I packed away all our pots and pans. Which leaves you basically zero easy food options (ie: no spaghetti of frozen pizza) when I travel for work all next week. Oops.} 

And while packing and moving may be a hassle, I have uncovered some gems like the below while we’ve been putting our entire lives into boxes…

can’t handle the CUTENESS…and the fact that my husband was blonde as a child…?!

…that remind me just how lucky I am to be married to my amazing cat-loving husband who has an appetite that doesn’t quit. He keeps me on my toes and I wouldn’t have it any other way.

Here’s to making many more culinary compromises…all in the name of love.

xoxo,

alaina

pucker up

img_0730
an easy-enough-for-wednesday but special-enough-for-valentine’s day dinner that will make you pucker up…in a good way!

I like to tell myself that I’m a good cook. I know I’m not amazing, but I do like to think that growing up helping my gourmet-chef-of-a-grandma cook  (this also referred to as getting in the way of my grandma trying to cook) and the the eight gazillion hours of Food Network I’ve watched with Tom have paid off in some small way.

That being said, my family will never call me a good cook. Why? Well, they refer to it as the “Lemon Chicken Incident of 2010

Let me explain.

I had just returned from spending the month with my grandparents down in Florida where I had interned with a minor league baseball team. While I was there, my grandma used Meyer lemons from a neighbor’s tree to make this amaaaazing lemon chicken dish that I just loved. Wanting to recreate it for my family back home before I headed back to college for the spring semester, I recreated the dish using what we had on-hand in early February in Minnesota: the lemon juice from a bottle. And since my grandma used one Meyer lemon that’s the size of small grapefruit that had a TON of juice…I decided that must have meant I needed at least the juice of four or five small lemons when I made the dish at home. Right?

Wrong. So, so wrong.

lemons
Meyer lemons (left) are a lot more like oranges and are mildly sweet. Regular lemons (right) are extremely acidic and tart. I did not quite understand this in 2010…

Since I’m sure you can guess where this is going (hint: meyer lemon does NOT equal concentrated lemon juice from a bottle) my family took one bite and made this face:

sour-face
my family feels you, cute baby

My mother was the only one to take more than one bite…because there is truly nothing like a mother’s love.

Anywho, seven years later I was seeking redemption. Tom had heard a heckuva lot of crap from my family about the disaster that was my stab at my grandma’s lemon chicken and I was ready to prove them all wrong. And, in all honesty, I was bored of our rotation of chicken dishes and I had a lot of lemons on hand. Soooo while I like to tell myself it was kismet…it probably stemmed from me not wanting to go grocery shopping.

On top of needing to redeem myself, I also knew this was a great opportunity to bring a new chicken dish into our weekly meal plan rotation. It’s primarily protein and I just needed to made some easy swaps (and pair it with a yummy salad from our friend Kaela’s mama) so that it was diabetic-friendly.

So…where’s the compromise?

Here’s our answer:

  • Ditch the thick crust of a traditional pan-seared chicken breast and utilize just a tiny amount of flour to get enough of a thin crust to soak up the sauce
  • Swap regular lemons in for the less-widely available Meyer lemons…but use significantly less juice
  • Use the power of deglazing to make a broth-based sauce instead of a flour-based gravy
  • Pair the dish with a kale salad that complements the lemon in the chicken and adds a nutrient (and protein)-packed punch

| Pucker-Up Chicken with Kaela’s Mama’s Kale Salad |

Serves: 3 Tom’s or 6 Alaina’s

Ingredients Needed:

For the chicken:

  • 6 chicken breasts, seasoned with salt/pepper
  • 1/4 cup flour
    • NOT almond flour. You know me…I tried. It burns. Don’t do it.
  • 2 lemons, juiced (~4 tbsp.)
  • 2 tbsp. olive oil
  • 1 tbsp. butter
  • 1 cup chicken broth
  • 2 tbsp. pickled capers (or more to taste)

For the salad:

  • 6ish cups, finely chopped kale (~one large bunch, chopped)
  • 3 cups, finely shredded manchego or parmesan cheese
    • Note: This salad is great for your friends who are dairy-free if your use the manchego cheese. Our friend Kaela has this restriction so that’s how we first had it served to us by her mama. It’s out of this world good with the manchego–but parmesan works too! 
  • 1/2 cup olive oil
  • 2 lemons, juiced and zested
  • Salt/pepper to taste

Directions:

First things first–get that salad prepped and set it aside!

  • Finely chop your kale and place in a large bowl (trust me…a large bowl!)

img_0688

  • Add cheese, olive oil, lemon juice/zest, and and salt/pepper to taste
    • Around ~1/2 tsp. of salt is perfect, but add less salt if you use a saltier cheese!
  • Toss, then set aside

img_0694

Now it’s time to tackle that chicken…

  • First things first, it is critical that you get your chicken breasts to be the same thickness in order for them to cook evenly
    • My favorite way to do this? Just toss them in a zip-top bag, remove the air from the bag, and give ’em a few good whacks with something heavy until they’re all looking about the same thickness #nomess

img_0692

  • Next up, salt and pepper those chicken breasts (yes, the chicken breasts directly)
    • Why? If the seasoning is only in your flour you won’t transmit as much flavor onto the chicken breasts because you’re using such a small amount of flour. 
    • Why don’t I see this in the picture? Good question. Because I forgot and had to salt and pepper them before I put them in the pan. Don’t be like me 🙂 Remember when I said I know I’m not that good of cook but I want to be? Here is Exhibit A. 
  • Spread your flour out of a plate and lightly coat both sides of your chicken breasts in flour and set aside on a separate plate
  • Once complete, give your chicken breasts another sprinkle of salt and pepper…seasoning is everything, people!
    • Bonus: Adding more salt/pepper will also make your sauce even yummier if you’ve got this extra flavor fun going on

img_0704

  • In a large skillet, heat your olive oil and melt your butter on medium-high heat
    • Question: Why olive oil AND butter? What gives?!
    • Answer: You only really need the olive oil, but the butter helps brown the chicken and give it an extra delicious bit of delectableness. Trust me, you want the butter #buttermakeseverythingbetter 

img_0705

  • Once olive oil is heated/butter is melted and pan is hot, add your chicken breasts to sear them on each side–this should take about 8-12 minutes or about 4-6 minutes a side
    • Pro Tip: As the chicken is cooking, turn them occasionally to avoid burning


  • Once chicken breasts are cooked (165 degrees F), remove from pan and place on a plate and cover with foil to keep them warm

img_0714

  • Increasing the pan heat to high, add lemon juice, chicken broth, and capers and stir/whisk vigorously (scraping all the caramelized yummy bits of chicken and flavor off the bottom of the pan as you do–also called “deglazing”) and bring the liquid to a boil
    • Note: Ensure you’re using a wooden spoon or coated whisk if you have a nonstick pan–you don’t want to run your nonstick coating!
  • Continue to stir/whisk boiling liquid until it slightly reduces in volume and the caramelized bits from the bottom of the pan dissolve into the sauce
    • Note: If desired, you can add some additional butter to smooth out the texture (I don’t think you need it…but in case you want a more buttery sauce!)
img_0718
terrible picture, but you get the idea–keep boiling until your sauce gets a bit thicker and the caramelized bits dissolve!

Nice job! You’ve got a salad, some chicken, and a sauce…now all you have to do is serve!

  • Serve your chicken with a spoonful or two of your sauce over the top (ensuring you’ve got lots of capers in there…mmmm) and with the kale salad on the side
final
yummy lemony goodness.


Now let’s get real: the first time I made this chicken I sang from the rooftops.

Why? Let me tell you:

  • It was actually edible (big win over the version I made in 2010)
  • The lemon-flavor was perfectly balanced 
  • My husband only needed to eat two chicken breasts and two servings of salad to be full (cue the hallelujah chorus)
    • 2 chicken breasts (86g of protein) + two servings of kale salad (6g of protein) = 92 GRAMS OF PROTEIN= FULL HUSBAND= HAPPY WIFE
      • Note: Who says Tom’s the math genius in the family now? That’s some pretty impressive math I just did there. 
  • I could have a delectable pan-fried-esque chicken dinner with under 6g of carbohydrates and no sugar per serving (score!!)
  • And most importantly…I felt like I redeemed myself

But seriously. I literally could not. stop. smiling. when this dish turned out.

Tom and I already adored the salad recipe from our bestest best friend Kaela and her amazing mama (I personally could eat buckets of that salad in lieu of other food for breakfast, lunch, or dinner. It’s that good.), but when it was paired with this lemon caper chicken it just made me swoon.

Even better? I got a literal thumbs up from my husband when I made it for him. So I did what any normal adult woman does–I made him take a picture of him doing it so I could prove to my family that once and for all I CAN MAKE LEMON CHICKEN SO PLEASE STOP TEASING ME:

img_1062

To which they responded (and I shouldn’t be surprised by this), by teasing me:

img_1067

We show love in our family by teasing each other ruthlessly. So really, all I can do is laugh at their reaction. Either way, I know that I did it and I’m happy I can maaaaayyyybe get away with calling myself a good cook now that I’ve overcome my most famous cooking disaster.

And on the bright side? Their teasing helped name my dish: “Pucker-Up Chicken” fits it perfectly.

Why? Because I know Tom loves this dish so much he’ll pucker up in good way and give me a smooch for making it 🙂

Here’s to making many more culinary compromises…all in the name of love.

xoxo,

alaina

piesgiving

img_0859
creamy, dreamy peanut butter pie with a scrumptious brownie-like chocolate crust…and it’s ALL refined-sugar free #isthisreallife

It’s almost game time, everyone. We’ve got mere days until the big dance: THANKSGIVING.

I know you may be thinking that the “big game” happens in early February–but in my job and in my kitchen, Thanksgiving is THE big day.

For my job in retail, Thanksgiving is the kick-off to the Q4 holiday shopping season. Although many believe Black Friday has lost its luster, the reality is that it’s still a BIG deal for many retailers. And while I may dissuade you from standing in line for hours on end just to get $30 dollars off a TV, I still think there’s some magic during those harried days in stores. There’s an almost palpable buzz of excitement in the air as you walk down the aisles that are “dressed their best” in bright colors and sparkles. And while many are harried and stressed, there’s just as many that are just enveloped in the joy of the season and smiling from ear to ear. Look for it; you’ll see it. It’s beautiful.

As for my kitchen, it’s a given that Thanksgiving is the Super Bowl of holidays for food lovers like myself. It’s the day where the stakes are high and the pressure’s on to ensure you get the once-a-year meal just right. And while my mother still won’t let me touch any of the super stars of the meal (I’m looking at you turkey, mashed potatoes, and stuffing), Tom and I still are usually in charge of some of the supporting actors for the meal. And for the past few years, that has included the last thing on the menu: the pie.

Now, I know what you’re thinking: “Who in their right mind would give the PIE responsibility to the girl who tries to make everything less sugary? Are they crazy?!” And while I acknowledge your very good point, I would like to mention that I’m not dumb and you do not need to be afraid to invite me to your Thanksgiving dinner. I will always bring a ginormous Costco pumpkin pie with me when I show up at your house for Thanksgiving…but I will also bring a darn good low-sugar alternative that, if I do my job right, will make you think twice about which pie you want.

Last year, I made a delectable crustless pumpkin pie for our families’ turkey day gatherings since pumpkin is Tom’s favorite type of pie. This year: it’s my turn. And while I’m not actually a huge fan of pie, I LOVE PEANUT BUTTER more than a woman should ever love a food item. So what did I do? I thought back to the only type of pie I’ve ever really liked…the kind that’s not really pie but mostly Oreos and Cool Whip:

peanutbutterpie
only a whole package of oreos, whole bucket of cool whip, and entire package of cream cheese in there. dang…no wonder it’s amazing.

Sadly, that specific icebox pie recipe isn’t going to cut it for how I need to eat nowadays. But I know I love it, Tom would love it, and there’s not a soul on this earth that doesn’t like chocolate and peanut butter together.

So…where’s the compromise?

Here’s our answer:

  • Cutting out the cream cheese/cool-whip combo and substituting whole milk greek yogurt for the rich base of the filling
  • Embracing the pie’s name and using lots and lots of natural peanut butter
  • Ditching the Oreos (I know, it’s sad…but it’s okay!) for the crust and instead using an almond flour/cocoa powder mixture sweetened with a touch of honey 

| Thankful for Peanut Butter Pie |

Serves: 8 Tom’s or 12 Alaina’s

Ingredients Needed:

For the crust:

  • 1 1/2 cups almond flour
    • As always, try to buy your almond flour at a club like Costco–it’s soooo much cheaper! They carry the Blue Diamond and Honeyville brand–either is good!
  • 1/2 cup unsweetened cocoa powder
  • 1 egg
  • 3 tbsp. salted butter, melted
  • 3 tbsp. honey
  • 1 tsp. vanilla

For the filling:

  • 1 1/2 cups whole milk yogurt
    • I reallllly recommend Chobani here–I’ve tried a few different brands, but Chobani has the thickest, non-watery whole milk yogurt I’ve found. You do not want watery pie! 
    • And don’t dare try this with anything other than whole milk yogurt–you need the fat for flavor!
chobani
Your best bet. I promise.
  • 3/4 cup natural creamy peanut butter
    • Again, not just “it says natural on the label” peanut butter–it should be the kind you have to stir. It may be a bit annoying, but you want peanut butter that has nothing in it but peanuts and salt! 
    • Market Pantry has a good version that costs under $2–natural doesn’t have to mean more expensive!
creamy-pb
my personal favorite. delish AND cheap. boom.
  • 2 1/2 tbsp. honey
  • 2 tsp. vanilla

Directions:

  • Preheat the oven to 350 degrees F

Now let’s get going on that crust…

  • In a food processor, pulse together flour, cocoa powder, melted butter, honey, vanilla, and egg until the dough forms a ball
  • Once the dough is formed, press dough into a NON-GREASED (seriously, you don’t need any) nine-inch pie pan and use your fingers to form an edge for the crust
    • Tip: Once you’ve pressed the dough in the pan as evenly as possible using your hands, use the back of a large spoon or your fingers to smooth the dough and create a nice edge
  • Bake crust in the oven for 10-14 minutes–watching closely after 10 minutes to ensure the pie doesn’t burn (this can happen quickly with almond flour!)
look at the nice thick crust...it means more chocolate in every bite!
look at the nice thick brownie-like crust…it means more chocolate in every bite!
  • Remove crust from oven and let cool completely–at least 2 hours but ideally even overnight
    • Why? Almond flour has a lot of moisture and you want it to cool and dry completely so your pie doesn’t get a soggy bottom when you add the filling!
    • If you do let it sit overnight, ensure you loosely cover with plastic wrap–NOT airtight! 
soggy-bottom
As Mary Berry knows, nobody wants a soggy bottom. Let that pie crust cool!

Tick-tock-tick-tock…crust is now cooled. Yippee! Next up: the filling…

  • In a medium-sized bowl, mix together by hand the yogurt, the peanut butter, the honey, and the vanilla until well-combined
    • Mixing by hand is crucial to ensure you don’t overmix–you want your filling to stay thick and creamy like a pudding
    • Tip: If you are using already-opened peanut butter jar from the fridge, microwave the peanut butter on HIGH for thirty seconds so it’s a “stirable” (making up words here…) consistency. If it’s a glass jar like the Market Pantry brand, I throw the entire jar in for thirty seconds and stir. Easy peasy!
    • Tip #2: This is a great time to use what I affectionately call the “peanut butter pusher” to measure and add the peanut butter!
  • Scoop the filling into the cooled pie crust and use the back of a spoon to smooth filling so it’s even over the top
    • Tip: Don’t overfill the pie–you want to ensure you have a nice crust edge! Don’t worry if you have a spoonful or two leftover–it’s a gift for you from the pie gods to eat straight from the bowl. Mmmmm…

Annnnd you’re done! Well, at least with the hands-on stuff…

  • Place your pie in the fridge and let set for at least four hours. Pie can be uncovered if eating day-of or if there’s nothing stinky in the fridge 🙂 Otherwise cover loosely with plastic wrap.
    • Tip: I recommend eating day-of or next day, if possible. For Thanksgiving Day, it’s pretty handy to just make the crust the day or two before and then quickly whip together the filling the morning of. Badda bing, badda boom! #nosoggybottom
img_3418
the hardest part: waiting to EAT! (ignore our messy fridge, por favor) also, what’s with fridges having such poor lighting? #justsaying

Now all you have to do is SERVE!

  • Serve directly from the fridge (you want the filling to stay chilled and somewhat stiff) and drizzle with chocolate syrup, if desired.
    • Tip: Between the yogurt and the peanut butter this pie is protein-PACKED…small slices are all you need! I usually get about 12 slices from a pie and each slice then still has over TWELVE grams of protein.
img_3426
look how beautifully is comes out of that pan. I mean C’MON.. it’s perfect!

Now I know what you’re thinking: you think you’re making a BIG risk serving a refined sugar-free, gluten-free, low-carb dessert on the most gluttonous holiday in existence. You don’t want to ruin the crowning glory of the big meal!

So  if you are thinking about making this dessert for your family or friends for turkey day, here’s my recommendation:

  1. Don’t tell them it’s healthy
    • Why? The reality is that the chances are pretty small anyone will notice. This pie is uber rich, creamy, and just sweet enough without hitting you over the head with it. That being said, if you DO tell someone other than your gluten-free millennial-aged cousin about this being a “healthier” pie, be prepared for it to go untouched. I may or may not have had this happen to me…#awkward 
  2. Bring chocolate sauce 
    • If all else fails, if you put chocolate sauce on something it will be eaten. Seriously. It doesn’t matter if your relatives/friends know if it’s healthy or not…everybody loves desserts topped with chocolate sauce. It’s science. 
  3. Bring a back-up
    • If you’re the ONLY one bringing pie to Thanksgiving, bring a back-up. This is not a traditional turkey day pie…so pick up a Costco pumpkin pie for $5.99 to have options for your friends/family. You don’t want to disappoint anyone by not having the classic pumpkin pie to offer the crowd! 

At the end of the day, I love this pie. I’m going to make it for Thanksgiving and other occasions as well–such as game nights, dinners with friends, and Thursdays.

Why? Because it’s so easy (fo’ real–it takes under 20 minutes of “active” time to make) and is absolutely guiltless with very few carbs and under 8 grams of naturally-occurring sugar per serving.

And my favorite part? It’s a great dessert to serve to crowds with food allergies or restrictions–especially those who are gluten-free or diabetic. Because at the end of the day, celebrations like Thanksgiving are about the people you share them with. What better way to show your love and gratitude to your loved ones than by making them a dessert that everyone can enjoy together?

the pie for all. mmmm.

So as you’re getting ready for the BIG DAY  (gameday, if you will), remember to take a deep breath in the midst of the craziness and remember what Thanksgiving is all about. It’s not about the perfect table setting. It’s not about a perfectly cooked turkey. It’s not about driving sales (gasp, I know…I almost feel guilty writing this). At the end of the day it’s about spending quality time with those closest to you and telling (or showing) them that you love them 

SO: Say ” I love you”. Give hugs. Play Old Maid with your Grandma. Laugh at your Great Uncle’s jokes you’ve heard a million times. Color with your nieces. Help do the dishes. And maybe, just maybe, think about making a pie that everyone–regardless of dietary restrictions–can enjoy around the table.

Here’s to making many more culinary compromises…all in the name of love.

xoxo,

alaina

one year

img_0548
one of our weeknight staples: flavorful turkey burgers that pack a flavor (and veggie-packed) punch and are ready in under 20 minutes

I can’t quite believe that this week it’s been one whole year since I started writing marrying tastes–a semi-regular brain dump and associated story of what’s being cooked up in both our kitchen and our lives. I started this crazy adventure because my then-new-husband encouraged me to find an outlet to do something my heart absolutely loved and (at the time) had absolutely no outlet for: writing. And as for me? When I sat down to write only two things came to mind: my sexy husband and the fact that I was hungry. Hence, a food/marriage blog was born!

And well, while the second part about why I chose to write about food may or may not be completely accurate, I have learned a heck of a lot over the past year–some of it related to food, some of it related to our marriage, and some of it related to the reality of sharing our lives over the interwebs.

Here’s the highlights:

  • I use the word “deal” way too much. Both in real life and in my writing. You’re going to start to notice now…crap…I shouldn’t have said anything
  • I will never try to make a healthy ice cream. Why? Because I love it more than anything and I would never do that to my husband or to the multiple ice cream shops we frequent who have by now come to probably rely on our sales dollars.
icecreamharriet
sebastian joe’s, adele’s… what ever would they do without our plethora of dollars?
  • I steal the covers. All the time. I try really, really hard not to–but it’s just happens. I also carry a blanket around my Fortune 50 company to try and stay warm in meetings. This may or may not halt my ability to climb the corporate ladder. TBD on that.
fuzzy-b
target’s fuzzy b–life changing.
  • One year in, marriage doesn’t somehow get easier. It’s always a journey and I’m always striving to learn how to be better wife and a better partner-in-crime. This week it means trying to remember not to put tomatoes in the scrambled eggs since Tom hates the texture. Baby steps.
toms worst nightmare
tom’s worst nightmare…i gotta remember this.
  • The internet and social media can be a scary and wonderful thing. It makes connections, but it also opens the doors for people to say terrible things about you with absolutely no consequences. I don’t cry often, but in the past year I’ve shed multiple tears–both when people have used my writing to tear me down but also when people (like my amazing co-worker who works full-time AND goes to school full-time) tells me that she loves my recipes and it helps her discover healthy meals she can quickly prepare between class and work.

All this being said,  here’s the crux of it: I’m not perfect and sometimes my recipes aren’t either. That being said, they’ve worked for us and our family and I love being able to take some time every few weeks and share them with you. If you enjoy them, I’m so glad you’ve taken the time to read my blog. If you don’t, that’s okay too–I’m using it as an opportunity to work on what Tom Rath calls my “strength” of being a Woo. I’ll never make everyone happy or win everyone over (as much as my inner psyche is just begging to make this happen)–and this teeny little blog is helping me learn that.

One year in, I’ve still got a lot of recipes to share with you–both old favorites as well as new recipes that I tinker with as often as I can. This time? It’s an “old” favorite–a weeknight go-to burger (yes, burger!) for those of us who 1) don’t have a grill (darn you one-year long house-hunt!) and/or 2) want a “grilled” burger when it’s too cold to go outside and use the real grill.

The beautiful part? Tom will always want a burger. Seriously. I don’t care if he just had his regular order of one chicken AND one steak burrito from Chipotle–the man (like all of us) loves burgers. And while the typically toppings of BBQ sauce and bacon don’t always make it onto our homemade burgers (sorry, babe), I can use it as an opportunity to pack a bunch of flavor (and a bunch of veggies) into an easy weeknight meal.

chipotle
tom’s normal order at chipotle. no…i’m not kidding. bless him and his wonderful appetite.

So…where’s the compromise?

Here’s our answer:

  • Swap the ground beef used in traditional burgers for the turkey–not because it’s necessarily better for you, but it’s a great way to ensure we’re getting a variety of lean proteins in our diet
  • Use pre-frozen 1/3 lb patties…because it’s fast, inexpensive, and oh-so-easy
  • Add all of the spices–because fat=flavor and turkey don’t have much flavor, people…it needs the spices…BIG TIME
  • Keep the burger nice and moist and prevent it from getting dry by pairing it with juicy tomatoes, creamy avocado, and melty cheese 

| Tuesday Turkey Burgers |

Serves: 1.5 Tom’s or 3 Alaina’s (read: makes three burgers)

Ingredients Needed:

  • 3 , 1/3 lb frozen turkey burger patties
    • We love the ease (and the price) of the Kirkland-brand frozen turkey patties from Costco–it’s $10.99 for twelve 1/3 lb. burgers…you really can’t go wrong.
turkey-burgers
delish.
  • 3 tsp. Miracle Whip
    • Don’t hate. I swear the little oomph of flavor this gives the burgers absolutely makes them. If you absolutely won’t eat Miracle Whip, stir together 3 tsp. of plain greek yogurt with some salt and paprika.
  • 1/2 cup chopped tomatoes
  • 1/4 cup chopped onion
  • 1 ripe avocado, sliced
  • 3 slices of cheese–ideally colby jack or pepperjack
  • 1 heart of romaine lettuce, leaves washed and separated
  • Paprika, to taste
  • Garlic powder, to taste
  • Onion powder, to taste
  • Pepper, to taste
  • Salt, to taste

Directions:

First up, you gotta get them burgers on the grill (pan)

  • Lightly spray your oven-safe grill pan with olive oil cooking spray (or any non-stick spray you have on-hand…although I will always recommend the Simply Balanced version!) and start heating on the stove over medium heat
img_0498
believe it or not, this is a clean grill pan. it’s just…you know…well-seasoned
  • Grab three turkey burgers from the freezer, lay them on a plate, and set them in the sink (no, I’m not kidding…this is going to save you from having olive oil and spices go everywhere)

img_0494

  • Once the plate is in the sink, spray/rub both sides of your burgers with olive oil
  • Once oiled, generously season with paprika, onion powder, garlic powder, salt, and pepper–remember, don’t hold back! Turkey burgers don’t have much flavor…this is your shot to make them uber-flavorful!
img_0500
see that mess? keep it all in the sink and save yourself the clean-up!
  • Once seasoned and your pan is hot, add your burgers to the grill pan and set a timer for twelve minutes–ensuring you flip the burgers halfway (around six minutes)
img_0501
ensure your pan is hot before adding the burgers!

Now that those burgers are on the grill, get working on those toppings (but remember to keep an eye on the burgers and occasionally use a spatula to get under the burgers to ensure they aren’t sticking)!

  • Chop the tomatoes and the onions and mix together in a bowl
  • Once your tomato mixture is ready, slice up your avocado
  • Finally, get out your cheese slices and the Miracle Whip–just so you’re ready to start building your burger the second they’re ready!
img_0493
burger prep station: ready and waiting

You’ve gotten everything prepped…now you just need to make sure your burgers are cooked!

  • After twelve minutes have passed, use a cooking thermometer to check to see if the burgers are at 165 degrees F.
    • Note: If they’re not yet done, flip the burgers and cook for two additional minutes. Continue flipping & cooking for as long as needed until the burgers hit 165 degrees F
img_0512
so mine were a bit over 165 degrees–whoops. no worries though, they were still moist and delish! better safe than sorry with turkey!

Your burgers are cooked…YAHOO! You’re almost done! Just get the toppings on and get these babies under the broiler to melt that magnificent cheese!

  • Once the burgers are cooked, add a tsp. of Miracle Whip to the center of each burgers and spread around gently (this is the “glue” to keep the tomatoes/onions on the burger)

img_0515

  • After this has been added, evenly distribute the tomato/onion mixture over the burgers
    • Note: It’s okay if some falls off the burger, it’s not the end of the world–just pile as much as you can on each burger!

img_0517

  • Next up, evenly distribute the slices of avocado over the burgers (this can be a bit of a balancing act…you can do it!)

img_3765

  • Finally, add a slice of cheese on top of each burger

img_0521

  • Once your burgers have all their toppings, pop them under the broiler for 2-3 minutes until the cheese has melted and turned just slightly brown

img_0525

  • Once the cheese is melty and delicious, remove from the oven and serve immediately–either over lettuce or in a bun

img_0526

Now, in all transparency, 99% of the time we eat these over lettuce. These are hearty burgers and since Tom is eating two of these bad boys he does not even miss the bun. That being said, we had eighteen hamburger buns leftover from Labor Day and I have no idea what we’re going to do with all of them…so if Tom wants buns I say “PLEASE EAT THEM BECAUSE THEY’RE TAKING UP ALL MY LIMITED FREEZER SPACE!

Phew, I digress. I dream of a day where we have a deep freeze…until then, I will probably still have a freezer full of hamburger buns.

deep-freeze
be still my heart…

The beauty of this dish is that it’s that easy to compromise on something as simple as the bun. We both are getting a protein-packed dinner with lots of delicious (and nutritious) veggies and neither of us are sacrificing taste or “going without” if we choose to eat our dinner with or without a bun.

I also hope you picked up on how all the prep is done for this meal while the meal is cooking. In other words, this meal goes from “What should we have for dinner?” to “Dinner is served!” in TWENTY MINUTES. Hallelujah, people!

I think this calls for an AMEN, my friends. This dinner is a Tuesday night savior in-between me coaching Girls on the Run and Tom’s fall ball league. We don’t sacrifice the nutrition of our dinner in our need-for-speed–instead we just ensure we always have everything on-hand for this efficient-as-it-gets weeknight burger.

compromise at its best, my friends

Most importantly, as promised, this burger is delectably juicy and flavorful--this ain’t your mama’s turkey burger. It’s got a kick from the all the spices (especially that ever-so-slightly smoky paprika), a tang from the Miracle Whip, and a perfect little bite from the raw onion. Add that smooth avocado and the cheesy goodness that marries it all together…mmm…it’s just too dang good.

And, as always, this dinner is a compromise–something we continue to learn more about in our marriage (and our meal plans) every day. I am so lucky I have a husband who’s willing to try all the items that come out of my test-kitchen (need I remind you all of the garbanzo bean cookie dough disaster?)… and even luckier that that you are willing to try out some of our recipes as well.

My recipes aren’t perfect and neither is our marriage, and I hope you see that in the stories I share. I burn cookies, don’t measure ingredients, and sometimes forget to assume positive intent with my wonderful husband (…sorry about that babe!)

At the end of the day, I am just so grateful for the opportunity to share our lives (and our appetite) with you over the past year and  I will continue to do so as long as you’ll let me.

Deal? Deal. 

{see? I told you I say “deal” a lot…}

Here’s to one year of making culinary compromises (and many more to come)…all in the name of love.

xoxo,

alaina

1, 2, 3, 4

IMG_0244
our version of a easy, weeknight summertime favorite: four-ingredient chicken caprese salad

Summer. is. busy.

There’s softball. And the other softball league. And BBQs.  And bonfires. And happy hours. And seasonal ice cream shops. And farmer’s markets. And festivals. And baseball games. And concerts. And lake adventures. And road trips. And, oh yeah…work.

In Minnesota, we love summer like no other state in the union. We’ve got only three months to spend every possible second outside before Ol’ Man Winter arrives and forces us to spend twenty minutes putting on eight layers of clothing just to go on a trip to the grocery store.

layers
a small snapshot of a minnesotan’s reality for a majority of the year

So what do we do? We soak up the sun. Literally.

We use up our PTO every Friday we can to have long weekends spent almost entirely outside. We head to the lakes every weeknight evening we can to walk around and simply soak up every ray of sunshine we can before sunset. We press “GO” starting every morning when we wake up and try to spend as little as time possible indoors. Why? Because we know winter is coming. 

In this drive to get outdoors, there is one thing that always seems to slow us down: dinner. We gotta eat, but we want something quick, fast, and healthy. We don’t want to turn the oven on, we don’t want to have to spend a lot of time prepping, and we sure-as-heck don’t want to have to spend eons doing the dishes.

Or normal summer go-to is grilling. But here’s the thing: grilling is fabulous, but there’s really only so many burgers/brats/chicken breasts we can eat. Towards then end-of-summer we’re searching for a quick meal that can fill Tom up without all the normal “time-savers” (pasta, bread, etc.) that I shouldn’t be eating much of for my health.

So…where’s the compromise?

Here’s our answer:

  • Limit our ingredients to just four items–the fewer the items, the less prep (and clean up) you need to do!
  • Utilize in-season ingredients like cherry tomatoes and basil that we can easily grow (or buy from the farmer’s market) that are uber-flavorful this time of year
  • Add a protein punch with rotisserie chicken and fresh mozzarella cheese–items that take zero prep and add a ton of oomph to a dish

| Easy Breezy Chicken Caprese |

Serves: 4 Tom’s or 6 Alaina’s

Ingredients Needed: 

  • 1 lb. cherry tomatoes, halved
  • 16 oz (1 lb) fresh mozzarella, chopped in small cubes
  • 4 cups rotisserie chicken, chopped
  • 1/2 cup fresh basil, thinly sliced
  • Balsamic vinegar (to taste)
  • Olive oil (to taste)

Directions:

First of all, get ready to chop, chop, chop! Slicing and dicing is literally 90% of this recipe!

  • Slice all of your cherry tomatoes in half and set aside
    • There are some NIFTY kitchen gadgets for this that I have seen while browsing my favorite kitchen stores, but otherwise you can usually do 2-3 at a time the “old-fashioned way” if you’re careful!
Image result for cherry tomato slicer
if you’re fancy, this is the way to do it…
IMG_0216
…or you can do it the old-fashioned way. not very sexy, but it works!
  • Chop your fresh mozzarella into small cubes–ideally following the below method:
    • Cut the log of mozzarella the long way into slices about 1/4 inch thick
    • From there, take each slice of mozzarella, lay it flat,  and (again the long way) slice into 1/4 inch thick strips
    • Once you have your strips, group them together into piles of six to eight strips and slice every 1/4 inch to create 1/4 inch cubes!
  • Finally, chop up your rotisserie chicken—or any pre-cooked chicken you have on hand! (You really can’t mess this up)

You’re literally almost done with dinner…now just start putting it all together!

  • For each bowl you’re prepping, add the following:
    • 3/4 cup(ish) chopped tomatoes
    • 1/4 cup(ish) cubed mozzarella
    • 1/2 cup(ish) chopped chicken
  • From there, add the following toppings:
    • ~1 tbsp. sliced basil
      • Pro Tip: Layer 4-6 leaves of basil on top of each other, roll it up, and use kitchen shears to easily slice basil over your bowls!
      • Alaina Tip: MORE BASIL=ALWAYS BETTER
    • ~1 tbsp. balsamic vinegar
    • ~1/2 tsp. olive oil
  • Finally, just give the bowls a quick toss to mix all that goodness together…then serve!
IMG_0240
mmmmm.

So here’s the thing, you’re probably thinking “I’ve had caprese salad before, Alaina. It’s good and all, but it’s nothing to write home about” But here’s the deal: have you ever had caprese salad not where it’s not just slices of cheese and tomato?

Have you ever had caprese salad where each bite is a flavor explosion of ever-so-sweet tomato and buttery mozzarella combined with a tangy zip of sweet/sour balsamic goodness and a fresh bite of basil? The beauty of this simple salad is that the balsamic vinegar ever-so-lightly coats the entire dish–making each forkful a balanced bite of tomato/mozz/chicken a mouth-watering flavor punch that keeps you wanting more.

Now normally, a frou-frou “salad” is definitely not something Tom would typically want for dinner. I mean, how is a salad supposed to fill up the guy who ate eighteen Sweet Martha’s cookies in one sitting at the State Fair this year?

yes, 18 cookies. also known at 1,620 calories. in under 10 minutes. i chose to be impressed instead of worrying about his health.

Here’s the answer:

Since you prepare each bowl separately, you can increase/decrease the ratio of ingredients to satisfy the appetite of everyone at the table. It’s marvelous.

For example:

  • Tom: 1/2 bowl chicken with big handfuls of cheese and tomatoes and just a touch of basil
  • Alaina: 1/4 bowl chicken with a big handful of tomatoes, a small handful of cheese, and an entire plant’s worth of basil

See? Same dinner, but we each can get enough food to be satisfied (ie: Tom wants all of the protein) and we can also adjust the ingredients to our liking (ie: I want to basically eat just basil for dinner)

Trader-Joes-Basil-Plants
if you love your basil and you can’t grow it or get it from a farmer’s market, get it at trader joe’s! you can get a plant’s worth for HALF the price of buying it fresh at your local grocery store.

It’s also a total pro-move for leftovers–instead of having leftovers be a soggy, mushy mess, you can leave the containers of chicken, tomatoes, mozzarella, and basil separate and just put together meals/lunches as you need them*. Talk about quick summertime meals– once everything’s prepped you can throw a dinner or lunch together in under two minutes. Seriously!

[*Note: When you’re putting this together for lunch the next day, I recommend putting in the tomatoes, then the balsamic/oil, then the chicken, then the cheese, then the basil. This keeps the balsamic from getting soaked into the chicken/cheese and getting soggy!]

So there you go–don’t waste one minute of the precious summertime we have left. Tom and I are soaking up every bit of sunshine we can and not sacrificing the nutrition or taste of our dinner in our rush to get outside. We’re just putting everything together as easy a 1, 2, 3 (4)!

Here’s to making many more culinary compromises…all in the name of love.

xoxo,

alaina

eight o’clock cravings

IMG_3225
our version of cookie dough: protein-packed yogurt-based “dough” flavored with real vanilla and sweetened with just a touch of honey!

Before I married Tom, I didn’t really have dessert items in the house.  Why? Because I have all of the self-control in the world to not buy sugary foods.

Not to toot my own horn, but my judgement is clear as day as I shop the Target grocery aisles–it’s almost as if I’m the best version of myself while food shopping. While the Target effect may haunt me in housewares (I’m telling you–I needed the watermelon water bottle…seriously…it’s not like my eight million other ones! Why? This one has WATERMELONS, of course!), I stick to my list when shopping for food.

waterbl
I love you, watermelon water bottle. No one can ever tell me you’re unnecessary.

Well, let me rephrase…I stick to my list when shopping for food…for me.

Enter husband.

I’ve learned over the past year that having a husband is a lot like adopting a twelve year-old boy who’s going through a massive growth spurt and has the appetite of a horse. All of a sudden my shopping lists have quadrupled, I actually use up the things I get at Costco before they expire, and all of a sudden our shopping cart has things like bread, chips, Jack’s pizza, and ice cream.

IMG_3029
For example, here’s my husband eating a loaf of warm cardamom raisin bread while on a walk. Pre-marriage, I would never be involved in such a thing. Post-marriage, I’m fighting him for the raisin-y bits.

Now I noted before that I have all the self-control in the world to not buy sugary foods. Oddly enough, I do not have this same self-control when it comes to eating the sugary foods when they’re in my house.

[Especially when it’s ice cream. God help me if it’s ice cream…especially cookie dough ice cream. Mmmm…]

ice cream
I’ve said it before and I’ll say it again. You are making a mistake if you don’t buy Market Pantry ice cream!

Anywho, so as it turns out, while I started out just taking a few bites here and there of Tom’s delectable treats…it became a little more 50/50 in the eating department of “Tom’s” special treats. Every night as 8 PM rolled around it became dessert time the Johnson Household. No bueno for the prediabetic over here.

So what did I do? I experimented and pinterest’ed to find a good substitute for our nightly cravings. Some were winners (like banana yummies or chocolate peanut butter milkshakes) and others were losers. One loser in particular sticks out specifically since Tom has dubbed it the worst thing I have ever made: garbanzo bean cookie dough.

disgusting cookie dough
it looks good…but it ain’t

After thinking Tom may never try anything I made ever again after what has now been dubbed the “Cookie Dough Incident” in our household, I started thinking back to other more diabetic-friendly concoctions I’ve made over the years that could satisfy our desire for a delicious after-dinner taste of something sweet. It had to be something low in sugar, but it also had to be something normal (read: no beans) for Tom to want to even try it. It was also important to me that it could satisfy in just a few bites…especially since I was getting awfully used to eating a full dessert every night.

So…where’s the compromise?

Here’s our answer:

  • Stick with what we love (hello, cookie dough!) and use plain, nonfat Greek yogurt and natural peanut butter for a protein-packed base that will fill you up in just a few bites
  • Utilize real vanilla (not vanilla yogurt) to achieve the vanilla-y goodness without all the added sugar
  • Sweeten the “dough” with just a touch of honey
  • Add-in just a small amount of mini semi-sweet chocolate chips…because otherwise there’s no way Tom will believe me that it’s cookie dough without chocolate!

| 8 O’Clock Cookie Dough |

Serves: 4 Tom’s or 6 Alaina’s

Ingredients Needed:

  • 1 1/8 cup plain, fat free Greek yogurt
  • 1/3 cup natural peanut butter (preferably crunchy), microwaved to soften
    • I really love Market Pantry Natural Chunky Peanut Butter, but whatever you use just make sure it’s a natural peanut butter (ie: you will have to stir it) and it’s just peanuts and salt. 
    • pb mpWhile you don’t have to use a crunchy/chunky version, it adds a great texture to the final product that’s delish
    • To soften, remove the lid from the jar and microwave for thirty seconds; spoon out what you need and put the rest back in the fridge! 
  • 1/2 tsp. vanilla extract
  • 2 tsp. real honey
    •  Make sure it’s real! You don’t want no corn syrup, people.
  • 1/4 cup mini semi-sweet chocolate chips
    • I’ve tried cacao nibs here and they’re a bit too bitter since the base of this is not sweet. That being said, if you love cacao nibs–go ahead and sub ’em in!

Directions:

  • In a lidded container that can hold at least two cups, dump in your yogurt and softened peanut butter; stir until combined

before...

  • Once completely combined, add in your vanilla and honey; stir until combined

..and after!

  • Once completely combined again, stir in the mini chips

IMG_3216


  • Cover and refrigerate at least two hours before consuming to let the “dough” set and the flavors meld
IMG_3219
ignore messy fridge. focus on how difficult it is to wait to hours to eat this deliciousness.
  • After at least two hours, enjoy!
    • This cookie “dough” will last up to five days if kept in the fridge with a lidded container
IMG_3226
it may not be the prettiest container, but goodness it’s good!

Now here’s the deal: this cookie “dough” is good. I love it. Heck, Tom even loves it. That being said, it’s not actual cookie dough so you do have to somewhat measure your expectations when comparing this dessert to the nectar of the gods that is real cookie dough in it all of its eating-raw-eggs-and-flour-are-going-to-kill-you glory.

This is one of my all-time favorite desserts because you only need a teensy bit to feel completely satisfied. One “Alaina” (1/4 cup-sized) serving has 10 (yes, TEN!) grams of protein and under 6 grams of sugar (including both natural and added) TOTAL. You may be thinking, “Psh, 1/4 cup?! I think I need more than 1/4 cup, crazy lady who tried to make cookie dough from chickpeas. I don’t trust you!” But seriously, trust me. It’s crazy filling. A few bites and your 8PM sweet-tooth and almost feral inner cry for dessert will be silenced. promise.

I may not have eaten a lot of dessert before I married Tom, but I also sure as heck didn’t love life as much as I do now. I have the privilege and the honor to be married to one of the most amazing men in the entire world who loves me almost as much as he loves food…and that’s saying a lot*

IMG_3206

[*Don’t worry, everyone. I’m just kidding. I know Tom loves me more than food 🙂]

So while I indulge a bit more frequently than I did before we were married, its been a fantastic reminder to maintain balance in our lives–both in regards to food and otherwise. As I’ve said before, I truly believe there is no such thing as “bad” food or “good” food–it’s all about moderation.

That being said, Tom may have thoughts about that last statement. I’m pretty sure he thinks that garbanzo bean cookie dough should be condemned to the “bad” food list for the entirety of forever and never consumed by anyone ever again…so maybe there’s an exception.

Here’s to making many more culinary compromises…all in the name of love.

xoxo,

alaina